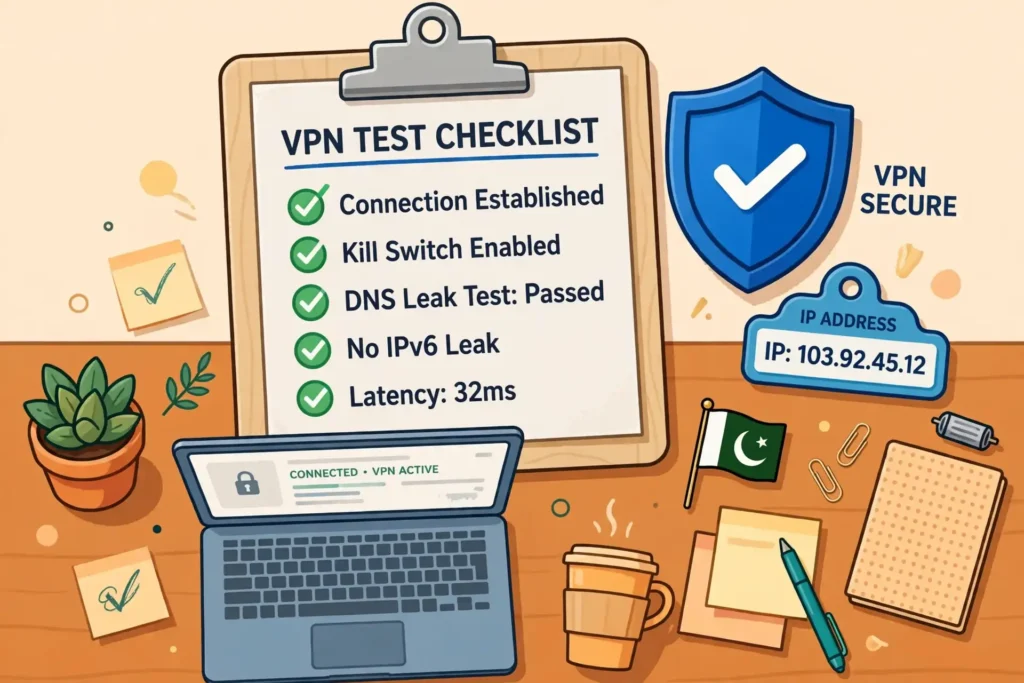
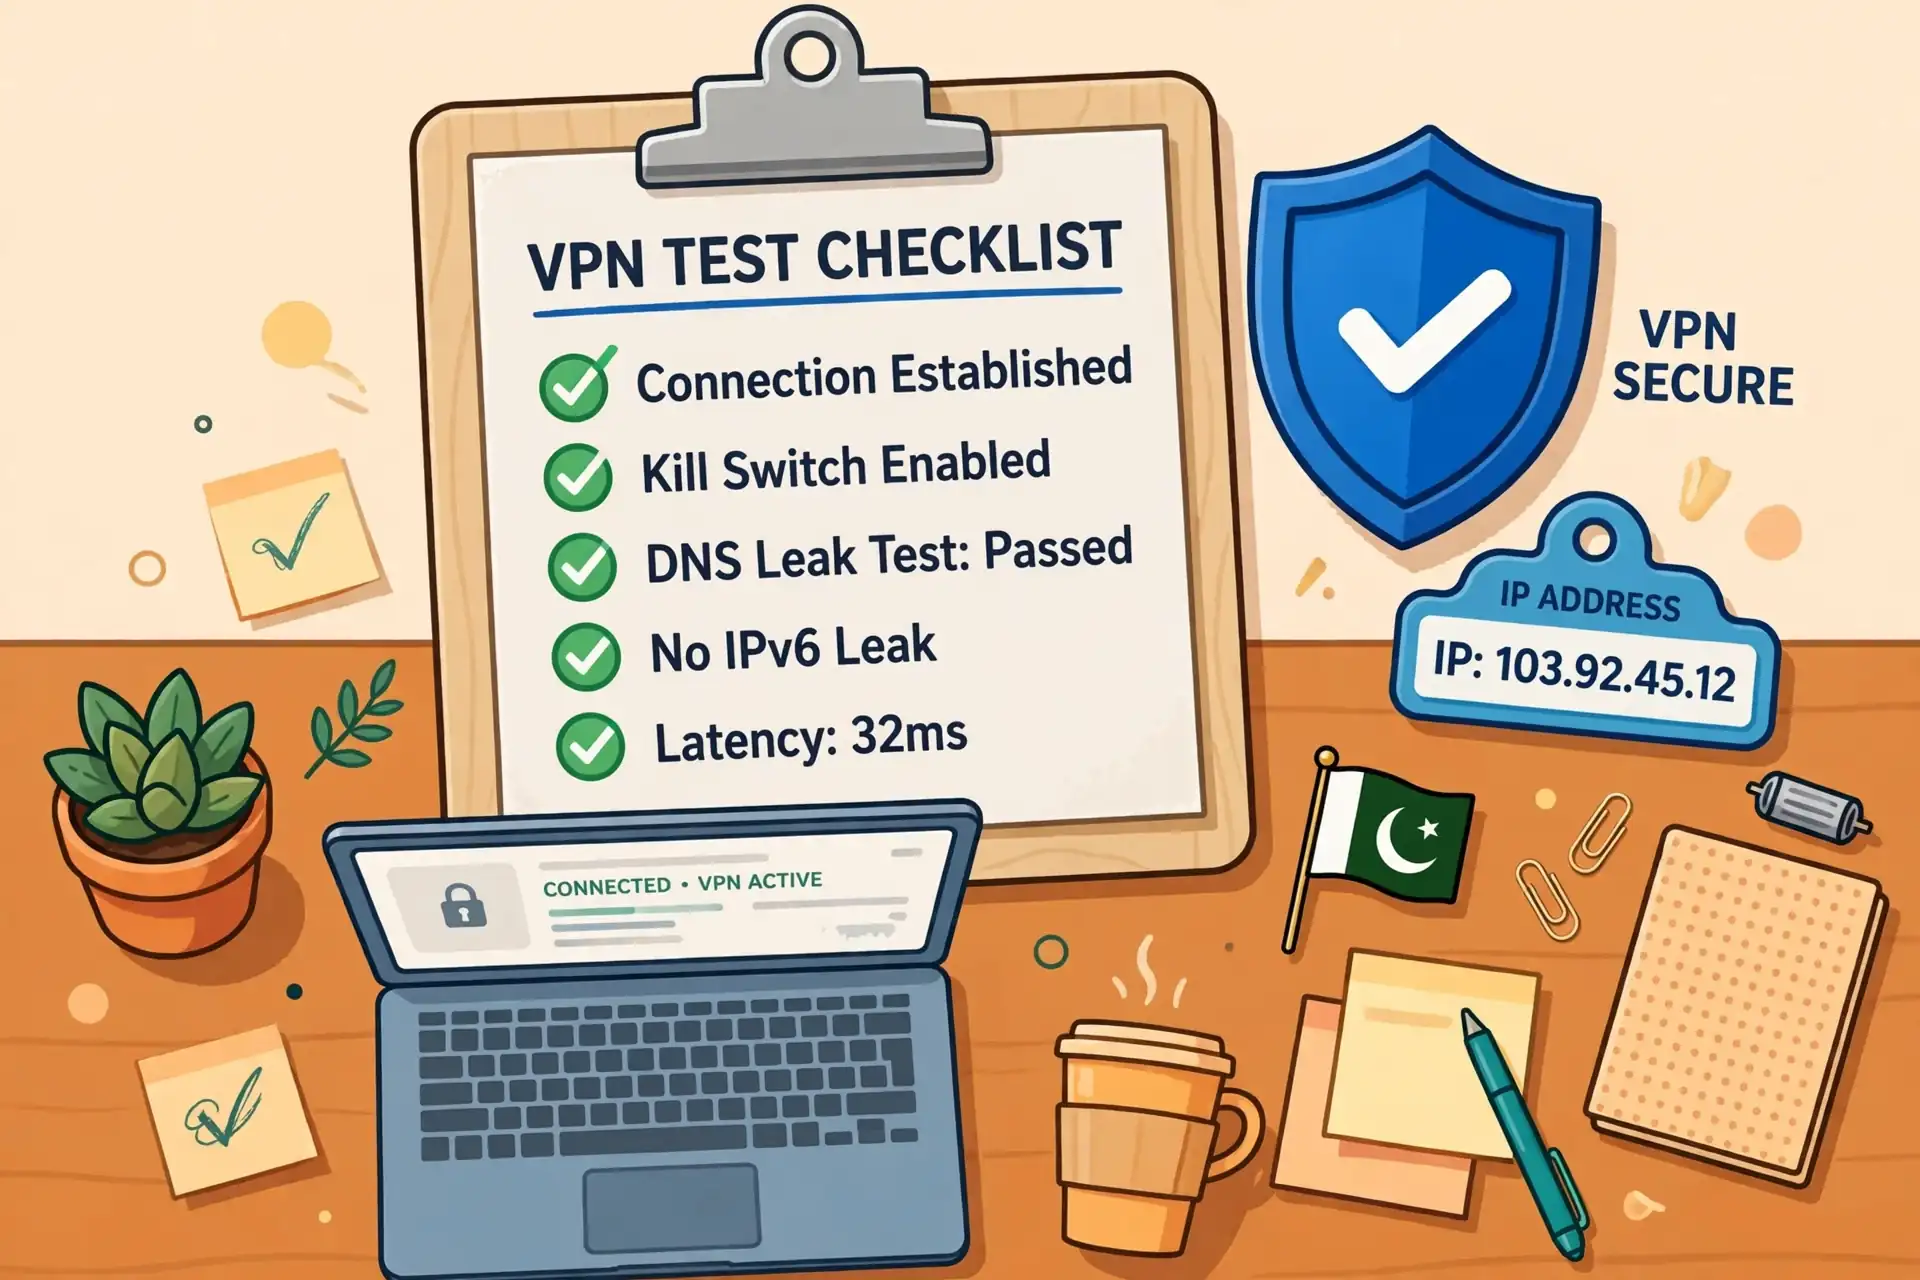
How to Test Dedicated IP VPN: The Short Answer
To test a dedicated IP VPN, record your real IP address with the VPN off, connect to your dedicated IP, and check the address again. Surfshark is our recommended VPN for Pakistan, with 80% off for our users, and it sells a dedicated IP add-on, so this method works directly with its setup.
The new address should match the one your provider assigned you in its dashboard or app. Then disconnect, reconnect, and check again on another day and from another device or network. If the same address appears every time, the dedicated IP is working as promised.
A dedicated IP is a public IP address that your VPN provider reserves for your account alone. No other customer’s traffic should leave the VPN through that address.
That is the whole promise, and it is also the whole test: the address must be yours, it must stay the same across sessions, and your traffic must actually use it. Everything else in this guide is a way of checking one of those three claims.
This guide is a test-method guide only. It explains how to check whether the same IP is assigned across sessions, how to spot a shared IP, how to run DNS and WebRTC leak checks, and what evidence to record. It does not invent test results, speed numbers, or measurements. Where sources disagree on pricing or availability, we flag the conflict instead of picking one figure.
Most competitors stop at “check your IP address and see if it changed.” That is only the first step. A single check cannot tell you whether the address is shared, whether your DNS requests leak, whether IPv6 traffic bypasses the tunnel, or whether the address survives a reconnect on a different network. This checklist covers all of those gaps, with Pakistan-specific notes for readers on Pakistani ISPs and mobile data.
Before You Start: Prerequisites and Safe Test Conditions
Before you run any test, gather four things: the dedicated IP address your provider assigned you, access to the provider’s dashboard or app where that address is shown, a reliable IP checker, and a notebook or document for recording results. Do not start testing until you can see the assigned address in writing. Without it, you have nothing to compare your results against.
Check that the dedicated IP add-on is actually active on your account. With most providers, including Surfshark and NordVPN, a dedicated IP is a paid add-on on top of the base subscription, not something included in the standard plan.
Log in to your account dashboard, open the dedicated IP section, and confirm the purchase, the country, and the exact address. If the dashboard shows no dedicated IP, stop and fix the purchase first.
Choose a safe time and place for the test. Run the first checks on your home Wi-Fi, where the connection is stable, rather than on public Wi-Fi or a moving mobile connection. A test run on an unstable network produces confusing results, because a dropped connection can look like a failed dedicated IP. Once the method works at home, repeat it on mobile data to confirm the result holds.
Close any other VPN app before you begin. Running two VPN apps at once, or leaving an old VPN profile active, can route your traffic through the wrong tunnel. Use one VPN at a time. Also close browser extensions that change your IP address, such as a second VPN extension, because they can override the app’s connection and confuse the result.
Make sure your VPN app is updated to the latest version. Providers change how dedicated IP connections are selected, and an old app may connect you to a shared server even when you pick the dedicated IP option. Check for updates in your app store or on the provider’s download page before testing. If an update is available, install it and restart the app.
Finally, understand what you are not testing. A dedicated IP test checks assignment and address persistence. It does not prove that your provider keeps no logs, that its servers are audited, or that your traffic is encrypted to a particular standard. Those are policy and audit questions, and they must be checked through the provider’s documentation and independent audit reports, not through any technical test you can run at home.
What a Dedicated IP VPN Test Can and Cannot Prove
A dedicated IP VPN test can prove three practical things. First, it can prove that the address you exit through matches the address your provider assigned you. Second, it can prove that the same address appears across sessions, days, devices, and networks. Third, it can prove that your DNS requests and browser traffic actually travel through the tunnel, rather than leaking around it.
It cannot prove that nobody else uses the address. That is a policy claim, and no test on your device can observe other customers’ traffic.
What you can do is look for indirect signs of sharing, such as the address appearing in other users’ reports, a CAPTCHA or block that suggests heavy shared use, or a WHOIS record that shows the address belongs to a hosting range rather than a single customer. Those are clues, not proof.
It also cannot prove that the address will never change. Providers can reassign a dedicated IP if a server is retired, if the address is abused, or if you change location. A good test result today means the assignment is working today. Repeat the check after any provider announcement, app update, or server change, and whenever a service that depends on the IP stops working.
It cannot prove that a service will accept your dedicated IP. Some banks, streaming platforms, and corporate systems block known VPN address ranges, including dedicated IPs. The only way to know is to test the actual service, which is why this guide includes a step for testing the real workflow you care about, not just an IP checker.
Keep those limits in mind as you work through the checklist. A test that passes every step below gives you strong practical confidence. It does not turn a policy promise into a technical guarantee, and this guide will not pretend otherwise.
Step 1: Record Your Baseline IP Address
Start with the VPN completely disconnected. Open your browser and visit an IP checker, or search for “what is my IP”. Write down the IPv4 address it shows, the city and country, and the name of your internet provider. This is your baseline, and every later result is compared against it. Without a baseline, you cannot tell whether a later address is your real one or the VPN’s.
Use at least two different IP checkers for the baseline. Different checkers can report slightly different location details for the same address, and using two gives you a cross-check if one of them looks wrong. Record both results with the date and time, and note which network you are on, such as home Wi-Fi or mobile data.
Also record your IPv6 address if the checker shows one. Many Pakistani connections now carry both IPv4 and IPv6, and a VPN that protects one but not the other can leak your real address through the unprotected family. If the checker shows an IPv6 address, write it down too. If it shows none, note that as well, because it tells you IPv6 may not be active on your connection.
Note the name of your ISP as the checker reports it. In Pakistan, this will usually be PTCL, Jazz, Zong, Telenor, or Ufone, depending on your connection. That name is useful later: if it still appears while the VPN is connected, something is leaking.
Our guide to getting a USA IP address explains the same baseline method for a different use case, and the habit of recording before and after applies here too.
Save the baseline somewhere you can find it again. A simple note on your phone, a text file, or a spreadsheet all work. The format does not matter. What matters is that the baseline is written down, dated, and easy to compare with later checks, because you will repeat this comparison several times in the steps below.
Step 2: Connect to Your Dedicated IP and Compare
Now open your VPN app and select the dedicated IP option, not a regular server. This step matters more than it sounds. With most providers, the dedicated IP is a separate entry in the server list, labelled “Dedicated IP”, “Static IP”, or similar. If you pick a normal server in the same country, you will get a shared address, and the test will fail for the wrong reason.
Check the app before you connect. Some apps show the assigned dedicated IP address on the server entry or in the account section. If yours does, compare it with the address in your dashboard. They should match. If the app shows a different address, or no address at all, note that before connecting, because it is evidence you may need later.
Connect, wait for the app to report that the tunnel is up, and then visit the same IP checker you used for the baseline. The address should now be different from your baseline, and it should match the dedicated IP your provider assigned you.
The country should match the country you bought the dedicated IP in, and the ISP name should be a hosting company or the VPN provider, not your Pakistani ISP.
If the address matches the assigned dedicated IP, record the result with the date, time, device, network, and server you selected. This is your first passing result. If it does not match, do not move on. Disconnect, check that you selected the dedicated IP entry and not a shared server, reconnect, and test again. A single mismatch at this stage usually means the wrong server was selected.
Step 3: Reconnect and Check Address Persistence
A dedicated IP must survive a reconnect. Disconnect the VPN completely, wait a few seconds, and connect to the dedicated IP again. Check the address a second time. It should be identical to the first connected result, down to the last number. If it changed, you are on a shared or rotating server, not a dedicated IP.
Repeat this disconnect-and-reconnect cycle at least three times in one session. Each time, record the address, the time, and the server selected. Three identical results in a row are a good sign. A single change among the three is enough to raise the question with support, because a dedicated IP should not rotate between reconnects.
Then test persistence across days. Check the address again tomorrow, and again a few days later, using the same dedicated IP entry. Record each result. A dedicated IP that is stable today but different next week may have been reassigned, or the provider may have moved your address to a different server. Either way, the change is worth knowing about before a service that depends on the IP stops working.
Pay attention to how the app behaves after a reconnect. Some apps have an auto-connect or “fastest server” option that can silently move you to a shared server after a dropped connection.
Turn off automatic server selection before testing, and check the app’s settings so the dedicated IP stays selected. If the app reconnects you to a different server on its own, that is a settings problem to fix, not a test failure.
Also note what happens when the connection drops unexpectedly. A kill switch should block your traffic until the tunnel is back, so your real IP never appears. If you see your real Pakistani IP during a reconnect, the kill switch may be off. Turn it on in the app’s settings, and repeat the test. Address persistence means nothing if the real IP leaks during the gap between connections.
Step 4: Test From a Second Device and Network
A dedicated IP is assigned to your account, not to one device, so the same address should appear on your phone, your laptop, and any other device you use. Connect to the dedicated IP from a second device and check the address.
It should match the address from the first device exactly. If it does not, check whether the second device is actually using the dedicated IP entry, or whether it connected to a shared server by mistake.
Test from a second network as well. Switch from home Wi-Fi to mobile data, connect to the dedicated IP, and check the address again. The address should stay the same, because the dedicated IP is assigned at the VPN server, not by your local network. If the address changes when you change networks, the provider may be assigning addresses per connection rather than per account.
This step catches a common misunderstanding. Some providers offer a “static IP” that is stable on one server but different on another, or a dedicated IP that only works on certain apps. Testing from two devices and two networks exposes those limits quickly. If the address is only stable on one device, the feature may be tied to that device’s setup, and support should be able to explain why.
Record each device and network result in the same log as your earlier checks. Include the device type, the operating system, the network, and the time. A log that shows the same address on a Windows laptop on PTCL fibre and an Android phone on Jazz mobile data is strong evidence that the assignment is working. A log that shows different addresses is the evidence support needs to investigate.
Step 5: Check Whether the IP Is Shared
You cannot directly observe other users’ traffic, but you can look for signs that the address is shared. Start with a WHOIS or RDAP lookup of the dedicated IP address.
The lookup should show that the address belongs to the VPN provider or its hosting partner, with the provider’s ASN. That is normal. What you are looking for is whether the address is listed as part of a large shared pool, or whether the provider’s documentation describes it differently.
Next, check the address against public blocklists. Search for the IP on lookups such as Spamhaus and similar reputation services. A clean dedicated IP should not be listed. If it is listed, it may have been abused by a previous user, or it may be shared with users whose activity got it flagged. Either way, ask your provider for a replacement address, and record the blocklist result as evidence.
Watch for CAPTCHAs and blocks during normal browsing while connected to the dedicated IP. A dedicated IP should attract fewer CAPTCHAs than a shared VPN address, because fewer users share its reputation.
If every site you visit shows a CAPTCHA, or if a service blocks you outright, the address may have a poor reputation, or it may be recognised as a VPN exit. That does not prove sharing, but it is a practical problem worth reporting.
Also test the address with a service that tracks IP reputation, such as a “what is my IP” page that shows whether the address is flagged as a VPN or proxy. Some checkers label VPN exits explicitly.
A dedicated IP will usually still be recognised as a VPN address, because it belongs to a hosting range. The useful comparison is against a shared server: the dedicated IP should behave more consistently, with fewer sudden blocks.
If you find evidence that the address is shared or abused, do not try to fix it yourself by changing settings. Contact support with the address, the blocklist result, and the dates of your tests. A provider that takes dedicated IPs seriously will replace a flagged address, and your log gives them everything they need to do it.

Step 6: Run DNS Leak Checks
A DNS leak happens when your device asks your ISP’s DNS servers where websites are, even while the VPN is connected. That can reveal which sites you visit, and it can also expose your real location through the DNS resolver. A dedicated IP test is incomplete without a DNS leak check, because the IP address can look correct while DNS traffic leaks around the tunnel.
With the VPN connected to your dedicated IP, run a DNS leak test from a leak-testing site. The test shows which DNS servers your device is using. Those servers should belong to your VPN provider or a data centre, not to your Pakistani ISP. If the test shows PTCL, Jazz, Zong, Telenor, or Ufone DNS servers, your DNS is leaking, and the tunnel is not carrying all of your traffic.
Run the test more than once, and try it in a different browser if the first result looks odd. Browsers can cache DNS results, and a cached result from before you connected can look like a leak. Clear your browser cache, or use a private window, and test again. If the leak persists in a clean browser, it is real, and you should treat it as a failed check.
Check your device’s DNS settings as well. On Windows, open the network adapter settings and confirm the DNS servers are set to automatic, or to the provider’s recommended servers. On Android and iOS, check the private DNS setting, and make sure it is not pointing at your ISP or at a third-party resolver that bypasses the VPN. A manual DNS setting from an earlier setup is a common cause of leaks.
If the test shows a leak, try reconnecting to the dedicated IP, then test again. If the leak continues, check whether your VPN app has a DNS leak protection setting and turn it on. Our IKEv2 VPN test checklist walks through the same leak checks for a different protocol, and the method is identical: the resolver must belong to the VPN, not to your ISP.
Step 7: Run WebRTC Leak Checks
WebRTC is a browser feature used for video calls and real-time communication, and it can reveal your real IP address even when a VPN is connected. A WebRTC leak test checks whether your browser exposes your real address, your local network address, or the VPN address. Run this test with the VPN connected to your dedicated IP, in each browser you use regularly.
Open a WebRTC leak test page and look at the addresses it reports. It should show the dedicated IP address, or no public address at all if the browser is blocking WebRTC exposure. It should not show your real Pakistani IP address. If your real IP appears, the browser is leaking, and the leak will follow you to any site that uses WebRTC, including video calling and conferencing services.
Test in every browser you use, because WebRTC behaviour differs between browsers. Chrome, Firefox, Edge, and Safari handle WebRTC differently, and an extension that blocks leaks in one browser may not be installed in another. A test that passes in Chrome but fails in Firefox tells you the problem is in the browser setup, not in the VPN tunnel.
If you find a WebRTC leak, first check whether your VPN app or browser has a WebRTC leak protection setting. Some VPN browser extensions include one. You can also disable WebRTC in the browser settings, or install a reputable extension that blocks WebRTC IP exposure. After changing the setting, run the test again to confirm the leak is gone. Do not assume a fix worked without retesting.
Record the WebRTC result alongside your DNS result. Both tests answer the same question from different angles: is all of your traffic actually going through the dedicated IP? An IP checker alone cannot answer that question, because it only shows the address seen by one page at one moment, for one kind of traffic.
Step 8: Test IPv6 Behaviour
IPv6 is the newer internet addressing system, and many Pakistani networks now support it alongside IPv4. A VPN that handles IPv4 correctly can still leak IPv6 traffic, sending it outside the tunnel through your real connection. Test IPv6 separately, because a fixed IPv4 exit does not prove that IPv6 uses the same service.
With the VPN disconnected, check whether your connection has IPv6 at all. An IP checker will show an IPv6 address if one is available. If your connection has no IPv6, note that, and this step is short: there is nothing to leak. If it does have IPv6, record the address as part of your baseline, just as you did for IPv4.
Now connect to the dedicated IP and check again. Look at both the IPv4 and IPv6 results. The IPv4 address should be your dedicated IP. The IPv6 result should either show a VPN-assigned IPv6 address, or show no IPv6 address at all if the VPN blocks IPv6 traffic.
What it should not show is your real IPv6 address from the baseline. If your real IPv6 address appears while the VPN is connected, IPv6 is leaking.
If you find an IPv6 leak, check your VPN app’s settings for an IPv6 leak protection or IPv6 blocking option, and turn it on. Some providers handle IPv6 by disabling it inside the tunnel, which is a legitimate approach. Others assign an IPv6 address through the tunnel.
Either is acceptable, as long as your real IPv6 address never appears. If the app has no such setting, you may need to disable IPv6 on your device while using the VPN, and your provider’s support pages should explain how.
Repeat the IPv6 check on each device you test, because IPv6 support varies by device and network. A phone on mobile data may have IPv6 while a laptop on the same Wi-Fi does not, or the reverse. The rule stays the same everywhere: the real IPv6 address must not appear while the VPN is connected.
Step 9: Test the Real Service That Needs the IP
An IP checker proves the address is correct. It does not prove that the service you bought the dedicated IP for will accept it. Test the actual workflow: log in to the bank, the remote desktop, the company system, or the website that needs the dedicated IP, while connected to it. That is the test that matters, and it is the one most guides skip.
Before the test, ask the service administrator to allowlist only your dedicated IP address, as a single address rather than a range. Then confirm two things: you can reach the resource with the VPN on, and you are blocked with it off. Both halves matter. If you can reach it with the VPN off, the allowlist is not actually restricting access, and the test proves nothing.
Try the full workflow, not just the login page. Open the dashboard, submit a form, upload a file, or run the API call you need. Some services accept the login from a new IP but block later steps, or they ask for extra verification on the first use of an address. Use the service normally for a few minutes, and note anything that behaves differently from your usual connection.
If the service blocks you while you are on the dedicated IP, record the exact error message, the time, and the address you were using. Then test the same service from a shared VPN server, and with the VPN off, and record those results too. The comparison tells support whether the problem is specific to the dedicated IP, or whether the service blocks VPN traffic in general.
Remember that some services cache risk decisions. A first login from a new dedicated IP may trigger extra checks, even if the IP is clean.
If the service works after you complete a verification step, that is normal, and it should not happen again on later logins from the same address. If it happens every time, the address may have a reputation problem, and the blocklist check in Step 5 becomes relevant again.
Step 10: Check the IP Reputation and Blocklists
A dedicated IP is only useful if other services trust it. Check the address against public blocklists and reputation lookups, and record the results. A clean result supports your case if a service blocks you later, because you can show the address was clean when you tested it. A listed result is a reason to ask for a replacement before you depend on the address.
Check at least two reputation sources, because one list can be out of date or can flag an entire hosting range rather than your single address. Look at whether the listing names your exact address or a wider block, and note the reason given, such as spam, abuse, or VPN detection. A listing that covers a whole range is less informative than one that names your address specifically.
Also check whether the address appears on lists of known VPN exits. Many services use such lists to block VPN traffic, and a dedicated IP in a known VPN range may still be blocked, even if it is not on an abuse blocklist.
That is a limitation of dedicated IPs in general, not a fault in your test. If a service you need blocks all VPN exits, a dedicated IP will not solve that problem, and you should know it before you pay for a long subscription.
Repeat the reputation check after a few weeks of use. An address that is clean today can be flagged later if the provider reassigns it, or if another customer somehow shares it. A regular reputation check, once a month or whenever a service starts blocking you, is a sensible habit for anyone who depends on a dedicated IP for work.
Dedicated IP VPN Test Results: Expected and Unexpected
The table below summarises what each check should show, and what a different result means. Use it as a quick reference while you work through the steps, and as a record of what you found. A test is only useful if you know what a pass looks like before you run it.
| Check | Expected Result | What It Means If Different |
|---|---|---|
| Baseline IP with VPN off | Real Pakistani IP, local ISP, correct city | If the address looks wrong, the checker or network is the problem, not the VPN. |
| Connected IP | Matches the dedicated IP in the provider dashboard | Wrong server selected, add-on not active, or assignment failed. |
| Address after reconnect | Identical to the first connected result | Shared or rotating server, or auto-select moved you to another server. |
| Address on a second device | Identical to the first device | Second device used a shared server, or the feature is device-specific. |
| Address on mobile data | Identical to the Wi-Fi result | Assignment may depend on the access network rather than the account. |
| DNS leak test | DNS servers belong to the VPN or a data centre | DNS traffic is leaking to your ISP. |
| WebRTC leak test | Dedicated IP only, or no public address shown | Browser is exposing your real IP through WebRTC. |
| IPv6 check | VPN IPv6 address, or no IPv6 shown | Real IPv6 address is leaking outside the tunnel. |
| Real service test | Access works with VPN on, blocked with VPN off | Service blocks VPN exits, or the allowlist is not set correctly. |
| Blocklist lookup | Address is clean and not listed | Address may be abused or shared, ask for a replacement. |
Read the table from top to bottom as a sequence, not as a menu. Each check builds on the one before it. A passing IP match means little if DNS leaks, and a clean DNS result means little if the address changes on reconnect. Work through the full list, record each result, and only then decide whether the dedicated IP is working.
If several checks fail at once, start with the simplest explanation. The most common cause is selecting the wrong server, followed by an inactive add-on, followed by a settings problem such as auto-select or a missing kill switch. Fix one thing at a time, retest, and record the change. Changing three settings at once makes it impossible to know which one fixed the problem.
Record Reproducible Evidence for Support
Good evidence is reproducible: someone else following your notes should get the same result. For each check, record the date and time in Pakistan time, the device and operating system, the network you used, the VPN app version, the server or dedicated IP entry you selected, and the result.
A line that reads “same IP on laptop and phone, 13 November, home Wi-Fi and Jazz data” is useful. A line that reads “it worked yesterday” is not.
Take screenshots of the key results. Capture the baseline IP, the connected IP, the DNS leak test, and the WebRTC test, with the date and time visible where possible. Screenshots are not a substitute for written notes, because an image alone does not say which device or network you used. Pair each screenshot with a written line in your log, so the two together tell the full story.
Keep the raw addresses in your log, not just “it matched.” Write down the full IPv4 address, and the IPv6 address if there is one. Support will ask for the exact address, and a log that says “matched” forces them to ask you to repeat the test.
A log with the exact address lets them check their own records immediately, and it often gets you an answer in one reply instead of five.
Include the error messages exactly as they appeared. If a service showed “access denied” or “unusual traffic,” copy the words, and note the time and the address you were using. If the VPN app showed an error code, record that too. Exact wording matters, because support teams search their records by error text, and a paraphrase can send them looking in the wrong place.
Store the log somewhere safe, and keep it after the problem is solved. A dedicated IP that works today may be reassigned next month, and a log of what it used to be helps you spot the change. It also helps if you ever need to prove to a service administrator that the address you are using is the one you were assigned, on the dates you used it.
Dedicated IP VPN Settings Check
Before you conclude the test, run through the settings that affect the result. A dedicated IP can fail because of a setting, not because of the service, and this checklist catches the settings most often responsible. Check each item, fix what is wrong, and retest before you contact support.
| Setting | What to Check | Why It Matters |
|---|---|---|
| Dedicated IP selected | The app shows the dedicated IP entry, not a shared server | Picking a normal server gives you a shared address. |
| Auto-select off | No “fastest server” or “recommended” option is active | Auto-select can move you off the dedicated IP after a drop. |
| Kill switch on | Traffic is blocked if the tunnel drops | Without it, your real IP can appear during a reconnect. |
| DNS leak protection on | The app routes DNS through the tunnel | Without it, DNS requests can leak to your ISP. |
| IPv6 handling set | IPv6 is blocked or routed through the tunnel | Without it, your real IPv6 address can leak. |
| Protocol stable | The app stays on one protocol during the test | Switching protocols mid-test can change the exit address. |
| App updated | Latest version installed from the official source | Old versions may not select dedicated IPs correctly. |
| One VPN at a time | No second VPN app or extension is running | A second VPN can override the dedicated IP connection. |
Work through the table in order, and change one setting at a time. After each change, reconnect to the dedicated IP and check the address again. If the result improves, you have found the cause. If nothing changes, move to the next setting. This methodical approach takes longer than changing everything at once, but it produces a log you can actually use.
Pay particular attention to auto-select and the kill switch, because those two cause the most confusion. Auto-select is helpful for a normal VPN connection, where any fast server will do, but it is the enemy of a dedicated IP test, where the whole point is to stay on one address.
The kill switch is the opposite: it is the setting that protects the test result during the moments when the connection drops, and it should stay on.
Troubleshooting: When the Result Differs
If the connected IP does not match the assigned dedicated IP, first confirm you selected the dedicated IP entry in the app. This is the most common cause, and it is also the easiest to fix. Open the server list, look for the entry labelled “Dedicated IP” or “Static IP”, and connect to that entry specifically. Then check the address again.
If the entry is correct but the address still differs, check whether the add-on is active in your account dashboard. A payment that failed, a subscription that lapsed, or an add-on bought for a different location can all leave you connected to a shared server. The dashboard will show the status, the country, and the address. If any of those look wrong, fix the purchase before you test further.
If the address matches at first but changes after a reconnect, look at the app’s auto-select and auto-connect settings. Turn off any option that lets the app choose a server for you, and make sure the dedicated IP entry is the one the app reconnects to. Then repeat the reconnect test three times, and record each result. If the address still changes, contact support with the log.
If DNS or WebRTC tests show a leak, check the settings in the table above, then retest in a clean browser window. Clear the cache, close other tabs, and run the test again. If the leak persists, try a different protocol in the app’s settings, such as switching between WireGuard and OpenVPN, and test again. A protocol change can fix a leak on some networks, and it is a legitimate troubleshooting step.
If a real service blocks you on the dedicated IP, check the blocklist result first. If the address is listed, ask your provider for a replacement. If it is clean, ask the service whether it blocks VPN exits in general.
Some services do, and no dedicated IP will get around that. In that case, the honest answer is that a dedicated IP is the wrong tool for that service, and you should not keep paying for it on that hope.
If nothing in this section resolves the problem, contact support with your full log: baseline, connected results, reconnect results, leak test results, device and network details, app version, and screenshots. A complete log gets a faster answer than a message that says “my dedicated IP does not work,” because support can check their records against your exact addresses and times.
Dedicated IP VPN Test Pakistan: Local Notes
Pakistan adds a few practical wrinkles to dedicated IP testing. The first is network variation. Home fibre from PTCL, mobile data from Jazz, Zong, or Telenor, and office or university Wi-Fi can all behave differently, and a VPN that works on one may struggle on another. Test on at least two networks, as Step 4 recommends, and do not declare the test passed until the result holds on both.
The second is the PTA. Pakistan’s telecom regulator operates a VPN registration regime, and businesses using VPNs for commercial purposes are expected to register them. The rules for individual, personal VPN use are less clear, and enforcement has focused on commercial and institutional users.
This guide is not legal advice, and the rules change, so check the current PTA position if you use a VPN for business purposes, and keep your use within the law as it stands.
The third is banking and government services. Pakistani banks and some official portals are sensitive to IP changes, and a new dedicated IP can trigger extra verification on first login. That is normal, and it should settle after the first successful login from the address.
If a bank blocks you repeatedly, the problem may be the address’s reputation, or the bank may block VPN exits entirely. Test with the bank’s own app and website, and record which one blocks you, because they sometimes behave differently.
The fourth is speed and latency. A dedicated IP ties you to one server in one location, and that server may be far from Pakistan. There is usually no dedicated IP location inside Pakistan itself that we could verify from official provider sources, so most readers will use an address in the United States, the United Kingdom, the Netherlands, or Germany.
The distance adds latency, which matters for video calls and gaming, and matters far less for browsing, email, and remote work. We have not measured speeds from Pakistan ourselves, and this guide makes no speed claims.
The fifth is payment. Dedicated IP add-ons are billed in US dollars, and the exact price you see can depend on your plan, your billing period, and the currency your card uses. Pakistani debit cards do not always work for international subscriptions, so check at checkout before you assume your card will be accepted. If a payment fails, that is a question for the provider and your bank, not a test problem.
Surfshark Dedicated IP for Pakistan Readers
Surfshark is our recommended VPN for Pakistan, and it is a natural fit for this test because it sells a dedicated IP add-on alongside its standard plans.
The add-on gives you one address in one location, reserved for your account, and you select it in the Surfshark app like any other server entry. The test method in this guide applies directly: record the baseline, connect to the dedicated IP entry, compare the address, and repeat across reconnects, devices, and networks.
Surfshark also includes static IP servers with every plan at no extra cost, which is a different feature from a dedicated IP. A static IP server gives you the same exit address each time you use that server, but the address may still be shared with other users of that server.
A dedicated IP is reserved for your account alone. Do not confuse the two when you test: make sure you are connected to the dedicated IP entry, not a static IP server, or the sharing checks in this guide will mislead you.
The practical advantage of Surfshark for readers in Pakistan is breadth. It lists servers in 100 countries, allows unlimited simultaneous connections, and includes a 7-day free trial on longer plans plus a 30-day money-back guarantee.
That trial and guarantee matter for a dedicated IP test, because they let you run the full checklist on your own network before you commit to a long subscription. Test first, then decide, rather than paying for a year and discovering the address does not suit you.
Choose Surfshark if you want a dedicated IP with a straightforward app, unlimited devices, and a money-back guarantee behind it. If you need the widest choice of dedicated IP locations, compare NordVPN as well, because it offers more dedicated IP countries, according to the sources we reviewed. Either way, run the checklist in this guide before you depend on the address for work, banking, or remote access.
Surfshark — our recommended VPN for Pakistan
Test the dedicated IP add-on on your own network, with 80% off for our users.
Pricing and Availability: What the Sources Disagree On
Dedicated IP pricing and availability change often, and the sources we reviewed in November 2026 do not agree on every figure. We flag the disagreements here rather than picking the number that looks tidiest, because a reader who budgets on a wrong price will be disappointed at checkout. Confirm the exact figure on the provider’s pricing page before you pay.
For Surfshark, the dedicated IP add-on price is reported fairly consistently at about $3.75 per month, on top of the base subscription, with the exact amount depending on your plan and billing period. That figure appears across several 2026 reviews, and it is the price to expect.
The location count is where sources disagree: some report 13 countries, some 15, some 16 locations in 13 countries, and some 20 locations. The disagreement likely reflects different counting methods and different dates, but we could not resolve it from official sources, so treat any single location count with caution.
For NordVPN, the dedicated IP add-on is reported at about $3.69 per month on a two-year plan, and about $4 per month in another review, with a higher monthly figure of about $9 on month-to-month billing. One comparison lists $4.19 per month as the starting price.
The country count is also disputed: sources report 27, 28, and 32 countries, and 51 cities in one review. Again, the differences likely reflect different dates and counting methods, and the exact figure should be checked on NordVPN’s own dedicated IP page.
CyberGhost is reported to offer a dedicated IP at about $2.50 per month on a two-year plan, which would make it cheaper than Surfshark and NordVPN, but we did not verify that figure against its checkout. Private Internet Access is reported to cover only 10 countries. Both figures come from third-party reviews, not from checkouts we completed, so treat them as indications, not guarantees.
The honest summary is this: expect to pay roughly $3 to $4 per month on top of your VPN subscription for a dedicated IP from a major provider, with the exact price shown only at checkout.
Expect the location list to change over time. And expect the cheapest headline price to assume a long-term plan, with higher prices on monthly billing and higher prices again at renewal. Check the checkout, not the review, before you commit.
Limitations of the Test
The biggest limitation is that no test on your device can prove exclusivity. A dedicated IP is a policy promise: the provider reserves the address for your account. Your tests can show that the address is stable, that it matches the assignment, and that your traffic uses it.
They cannot show that no other customer ever uses it, because that traffic never passes through your device. If exclusivity is critical for your work, ask the provider for its written policy, and check whether it has been audited.
The second limitation is that an IP checker only shows the address seen by that page at that moment. It does not prove that every application, every DNS request, and every address family follows the same path. That is why this guide includes separate DNS, WebRTC, and IPv6 checks, and a test of the real service you care about. A single IP check is a starting point, not a conclusion.
The third limitation is time. A test that passes today can fail next month if the provider retires a server, reassigns your address, or changes its network. Repeat the core checks — the connected IP, the reconnect test, and the leak tests — after any app update, any provider announcement, and whenever a service that depends on the IP stops working. A five-minute recheck is cheaper than a day of locked-out work.
The fourth limitation is that reputation is not fully in your control. An address that is clean today can be flagged tomorrow, and a service that accepts VPN traffic today can start blocking it tomorrow. Regular blocklist checks and a willingness to ask for a replacement address are part of using a dedicated IP, not a sign that the test failed. Build that habit into your routine.
Finally, remember that a dedicated IP does not make you anonymous, and it does not hide the fact that you use a VPN. Services can still recognise the address as belonging to a hosting range, and they can still block it for that reason.
A dedicated IP solves the problem of a changing, shared address. It does not solve the problem of a service that blocks VPNs altogether. Know which problem you have before you pay.

How to Check Dedicated IP VPN: Frequently Asked Questions
How Do I Test Dedicated IP VPN?
Record your real IP address with the VPN off, then connect to the dedicated IP entry in your VPN app and check the address again. It should match the address your provider assigned you in its dashboard. Then disconnect and reconnect several times, and test from a second device and network. If the same address appears every time, the dedicated IP is working.
Also run DNS leak, WebRTC leak, and IPv6 checks while connected, and test the real service that needs the IP. Record every result with the date, time, device, and network, so you have reproducible evidence if you need to contact support.
What Result Should I Expect?
You should expect the connected IP address to match the dedicated IP in your provider’s dashboard exactly, and to stay identical across reconnects, days, devices, and networks. Your DNS servers should belong to the VPN or a data centre, not to your Pakistani ISP. WebRTC should not expose your real IP, and your real IPv6 address should not appear while the VPN is connected.
The real service you need should work with the VPN on and be blocked with it off, if it uses an allowlist. If any of those results differ, work through the troubleshooting section, check the settings table, and retest before you conclude the dedicated IP is faulty.
What Evidence Should I Send Support If the Result Differs?
Send the exact addresses, not just “it did not match.” Include your baseline IP, the connected IP on each test, the dedicated IP shown in your dashboard, and the dates and times of each check. Add the device, operating system, network, VPN app version, and the server entry you selected. Include screenshots of the IP checker, the DNS leak test, and the WebRTC test.
Add the exact error message from any service that blocked you, and the blocklist result if the address is listed. A complete log like this lets support check their records against your addresses immediately, and it usually gets you an answer in one reply instead of five.
Surfshark — our recommended VPN for Pakistan
Run the full checklist on your own network first — 80% off for our users.
Conclusion: Test Before You Depend on the Address
A dedicated IP is only useful if you have checked it. Record your baseline, connect to the dedicated IP entry, compare the address with the one in your dashboard, and then prove it stays the same across reconnects, devices, and networks. Run the DNS, WebRTC, and IPv6 leak checks, test the real service that needs the IP, and check the address against blocklists. Record every result with dates, times, and exact addresses.
That checklist takes less than an hour the first time, and five minutes to repeat. It is the difference between assuming your dedicated IP works and knowing it does. And if a result differs, your log is the evidence that gets the problem fixed, whether the cause is a wrong server, a setting, a leaked connection, or an address that needs replacing.
Do not pay for a year of dedicated IP service before you have run the test. Use a trial or a money-back guarantee, run the checklist on your own Pakistani network, and only then commit.
Surfshark is our recommended VPN for Pakistan, with 80% off for our users, and it is the provider we suggest starting with — but whichever provider you choose, test first, record the evidence, and retest whenever anything changes.