If you want to know how to set up VPN on Chromebook, the simplest answer is to install an Android VPN app from Google Play, and Surfshark is the VPN we recommend for most readers in Pakistan, with 80% off for our users — one subscription covers unlimited devices, including every Chromebook in the house.
A Chromebook is not a Windows laptop, and that difference shapes the whole setup. ChromeOS has no native VPN app of its own, so every VPN on a Chromebook is either an Android app, a Chrome extension, a manual connection in the built-in ChromeOS VPN client, or a Linux or router setup.
The method you choose decides how much of your traffic is actually protected. An Android app protects the whole device, while a Chrome extension protects only the browser, and the built-in client protects the device but gives you no app features such as a kill switch interface.
This guide walks through every supported method in order, starting with the Android app, then the extension, then the built-in client, then the advanced routes. It also covers permissions, version requirements, verification and removal, so you can finish the setup and prove it works.
Nothing here assumes your Chromebook runs a native VPN app, because no Chromebook does. Your model, your ChromeOS version and whether the device is managed by a school or employer matter more than any marketing claim about a provider.
The Short Answer: How to Set Up a VPN on Chromebook
For most personal Chromebooks, install the provider Android app from Google Play, sign in, allow the VPN permission when ChromeOS asks, pick a server and connect. That is the whole setup, and it takes about five minutes once you have a subscription.
If your Chromebook cannot run Android apps, install the provider Chrome extension from the Chrome Web Store instead. It installs in under a minute and works on every Chromebook, but it protects only traffic inside Chrome, not Android apps or Linux tools.
If your provider offers no app or extension, use the built-in ChromeOS VPN client in Settings under Network. Google documents built-in support for IKEv2, L2TP over IPsec, basic OpenVPN and WireGuard on some Chromebooks, and you will need server details from your provider.
Managed school or work Chromebooks are the exception. An administrator may block the Play Store, block extensions or lock VPN settings, and no method in this guide can override that. Ask the administrator what is permitted before you change anything.
| Setup Method | What It Protects | Needs Play Store | Best For |
|---|---|---|---|
| Android app from Google Play | Whole device | Yes | Most personal Chromebooks |
| Chrome extension | Chrome browser only | No | Old or managed Chromebooks |
| Built-in ChromeOS VPN client | Whole device | No | Manual setup without an app |
| Linux app in Crostini | Linux tools mainly | No | Technical users |
| Router VPN | Whole home network | No | Chromebooks with no app support |
Before You Start: Check Your Chromebook
Check whether your Chromebook supports Google Play before you buy anything. Open the launcher, look for the Play Store icon, and open Settings, then Apps, and confirm the Google Play Store section is present and switched on. If it is missing, the Android app method is closed to you.
Most Chromebooks sold since 2017 support Android apps, and all models launched in or after 2019 support them by default. Older models may not, and some managed school devices have the Play Store disabled even when the hardware supports it. The setting on your own device is the only check that counts.
Next, check that ChromeOS is up to date. Open Settings, then About ChromeOS, and select Check for updates. ChromeOS updates itself automatically in the background, but a device that has been switched off for months can be several versions behind, and provider apps target current releases.
Also check whether the device is managed. If you see a message that the device is managed by an administrator, or if settings are greyed out, your school or employer controls what you can install. Ask the IT department which VPN options are permitted rather than trying to work around the policy.
Finally, buy the subscription on the provider website before you install the app. In-app purchases through the Play Store can follow different pricing and refund rules, so the website checkout is the safer route, and it also lets you sign in with the same account on every device.
Keep a second method ready while you test. Some networks in Pakistan restrict VPN websites or app downloads, so download and test your chosen method while you still have a working connection, and know your fallback before you need it.
Method 1: Install an Android VPN App From Google Play
The Android app method is the best default for most readers, because it gives you a full system VPN. Once connected, it protects the Chrome browser, Android apps and, depending on the model, Linux tools as well, and it gives you the provider kill switch and full server list.
Start by opening the Google Play Store on your Chromebook. If the icon is missing from the launcher, open Settings, then Apps, and switch on the option to install apps and games from Google Play. If that option is not there at all, your Chromebook does not support Android apps.
Search for your VPN provider by name and check that the listing shows the official developer name before you install. Fake VPN apps exist on the Play Store, and a lookalike app can steal your credentials, so confirm the developer matches the provider website.
Tap Install and wait for the download to finish, then open the app from the launcher and sign in with the subscription account you created on the provider website. Do not create a second account inside the app unless the provider asks you to.
When ChromeOS shows the connection request, read it and tap OK to allow the app to set up a VPN connection. This permission is the whole point of the app, and the VPN cannot work if you deny it. The prompt appears once, the first time you connect.
Pick a server country in the app, tap connect, and wait for the status to change to connected. Choose a nearby country such as Singapore for the fastest connection from Pakistan, unless you need a specific country for a particular service.
- Open Google Play on your Chromebook and confirm it is switched on.
- Search for your VPN provider and confirm the official developer name.
- Install the app, then open it and sign in with your subscription.
- Allow the ChromeOS VPN connection request when it appears.
- Pick a server country and tap connect.
- Verify the connection with the checks later in this guide.
Test the app on your real device before you rely on it. Some Android VPN apps open in a narrow phone-shaped window on a Chromebook screen, some lose the connection when the Chromebook sleeps, and some do not restore the connection after a restart without being opened again.
Flagged: whether a provider Android app keeps its kill switch and auto-connect settings after a Chromebook restart or power loss varies by app and model. Google cautions that ChromeOS does not control Android app behaviour after power loss, so test a restart yourself rather than assuming the protection survives one.
If the app misbehaves, check the provider support page for Chromebook-specific notes before you give up on it. NordVPN, for example, cautions that some older Chromebook models may not support its Android app, and the same model-by-model limit can apply to other providers too.
Surfshark on Chromebook: Our Recommended Android App
Surfshark is the VPN we recommend for most Chromebook owners in Pakistan, because its Android app is a full-featured client rather than a cut-down mobile port. It installs from the Play Store in about a minute, supports WireGuard and OpenVPN, and includes a kill switch and CleanWeb ad and tracker blocking.
Surfshark states that its app supports all Chromebooks that run Android apps, including models from ASUS, Acer, Dell, HP, Lenovo and Samsung. That is a wider compatibility claim than most providers make, and it matches the method in this guide exactly.
The unlimited device allowance is the practical advantage for Pakistani households and students. One subscription covers every Chromebook, phone, laptop and tablet in the home, with no need to count connections or buy a second subscription when a family member gets a new device.
Surfshark also offers a Chrome extension that works on its own, so readers whose Chromebook cannot run Android apps still have a Surfshark route. The extension protects only the browser, but it is a genuine fallback rather than a dead end. For the full cost picture, see our Surfshark pricing guide for Pakistan.
Surfshark — our recommended VPN for Pakistan
One subscription covers every Chromebook, phone and laptop in your home, and the same account works on Android, Windows, iPhone and macOS.
Method 2: Add a Chrome Extension
The Chrome extension method is the quickest way onto a Chromebook, and it works on every model, including old Chromebooks without Android app support and managed school devices where the Play Store is locked. Installation takes less than a minute and needs no system settings.
Open the Chrome Web Store in the Chrome browser, search for your provider official extension, and select Add to Chrome. Check that the listing shows the company verified domain before you install, because copycat extensions exist and a fake one can capture your login.
Open the extension from the toolbar, sign in with your subscription, pick a server and connect. There are no certificates to import, no server addresses to type, and no restart required, which is why this method suits readers who only need quick browser protection.
The limit must be stated plainly every time. A browser extension protects only the traffic inside Chrome browser tabs. It does not protect Android apps, Linux apps or other programs on your Chromebook, so a messaging app or a Linux tool running outside Chrome travels on your normal connection.
Extensions also differ in what they actually do. Some are full VPN extensions that route browser traffic through an encrypted tunnel, while others are proxy extensions that change your visible location without the same encryption. Read the provider description and do not assume every extension labelled VPN offers the same protection.
No major provider Chrome extension includes a kill switch, according to independent testing in 2026, though none of the tested extensions leaked an IP address through WebRTC either. That gap alone is a strong reason to prefer the Android app whenever your Chromebook supports it.
ExpressVPN needs a special note here. Its Chrome extension opens in Remote Control mode, which expects a desktop app, and ChromeOS has no desktop app. You must switch the extension to Proxy Mode in its settings before it connects on its own, and even then it offers limited privacy protection and browser-only coverage.
Method 3: Set Up the Built-In ChromeOS VPN Client
The built-in ChromeOS VPN client is the most flexible method for Chromebook owners whose provider offers no Android app, or whose model lacks Google Play support. You configure it in Settings under Network, and it works without any provider app installed on the device.
Google documents built-in support for IKEv2, which uses a pre-shared key, user certificates or username and password authentication, and for L2TP over IPsec, which uses a pre-shared key or certificates plus a username and password. Both are standard protocols that many providers document for manual setup.
ChromeOS also has basic support for OpenVPN servers, using username and password authentication, client certificate authentication or a combination of both. If you need advanced OpenVPN features or want to import an .ovpn configuration file, Google recommends installing OpenVPN for Android from the Play Store instead.
Some Chromebooks also have basic built-in support for the WireGuard protocol. That support is not universal, so check whether WireGuard appears as a provider type in your own Settings before you plan a setup around it. Chromebooks with the Play Store can also connect to PPTP services.
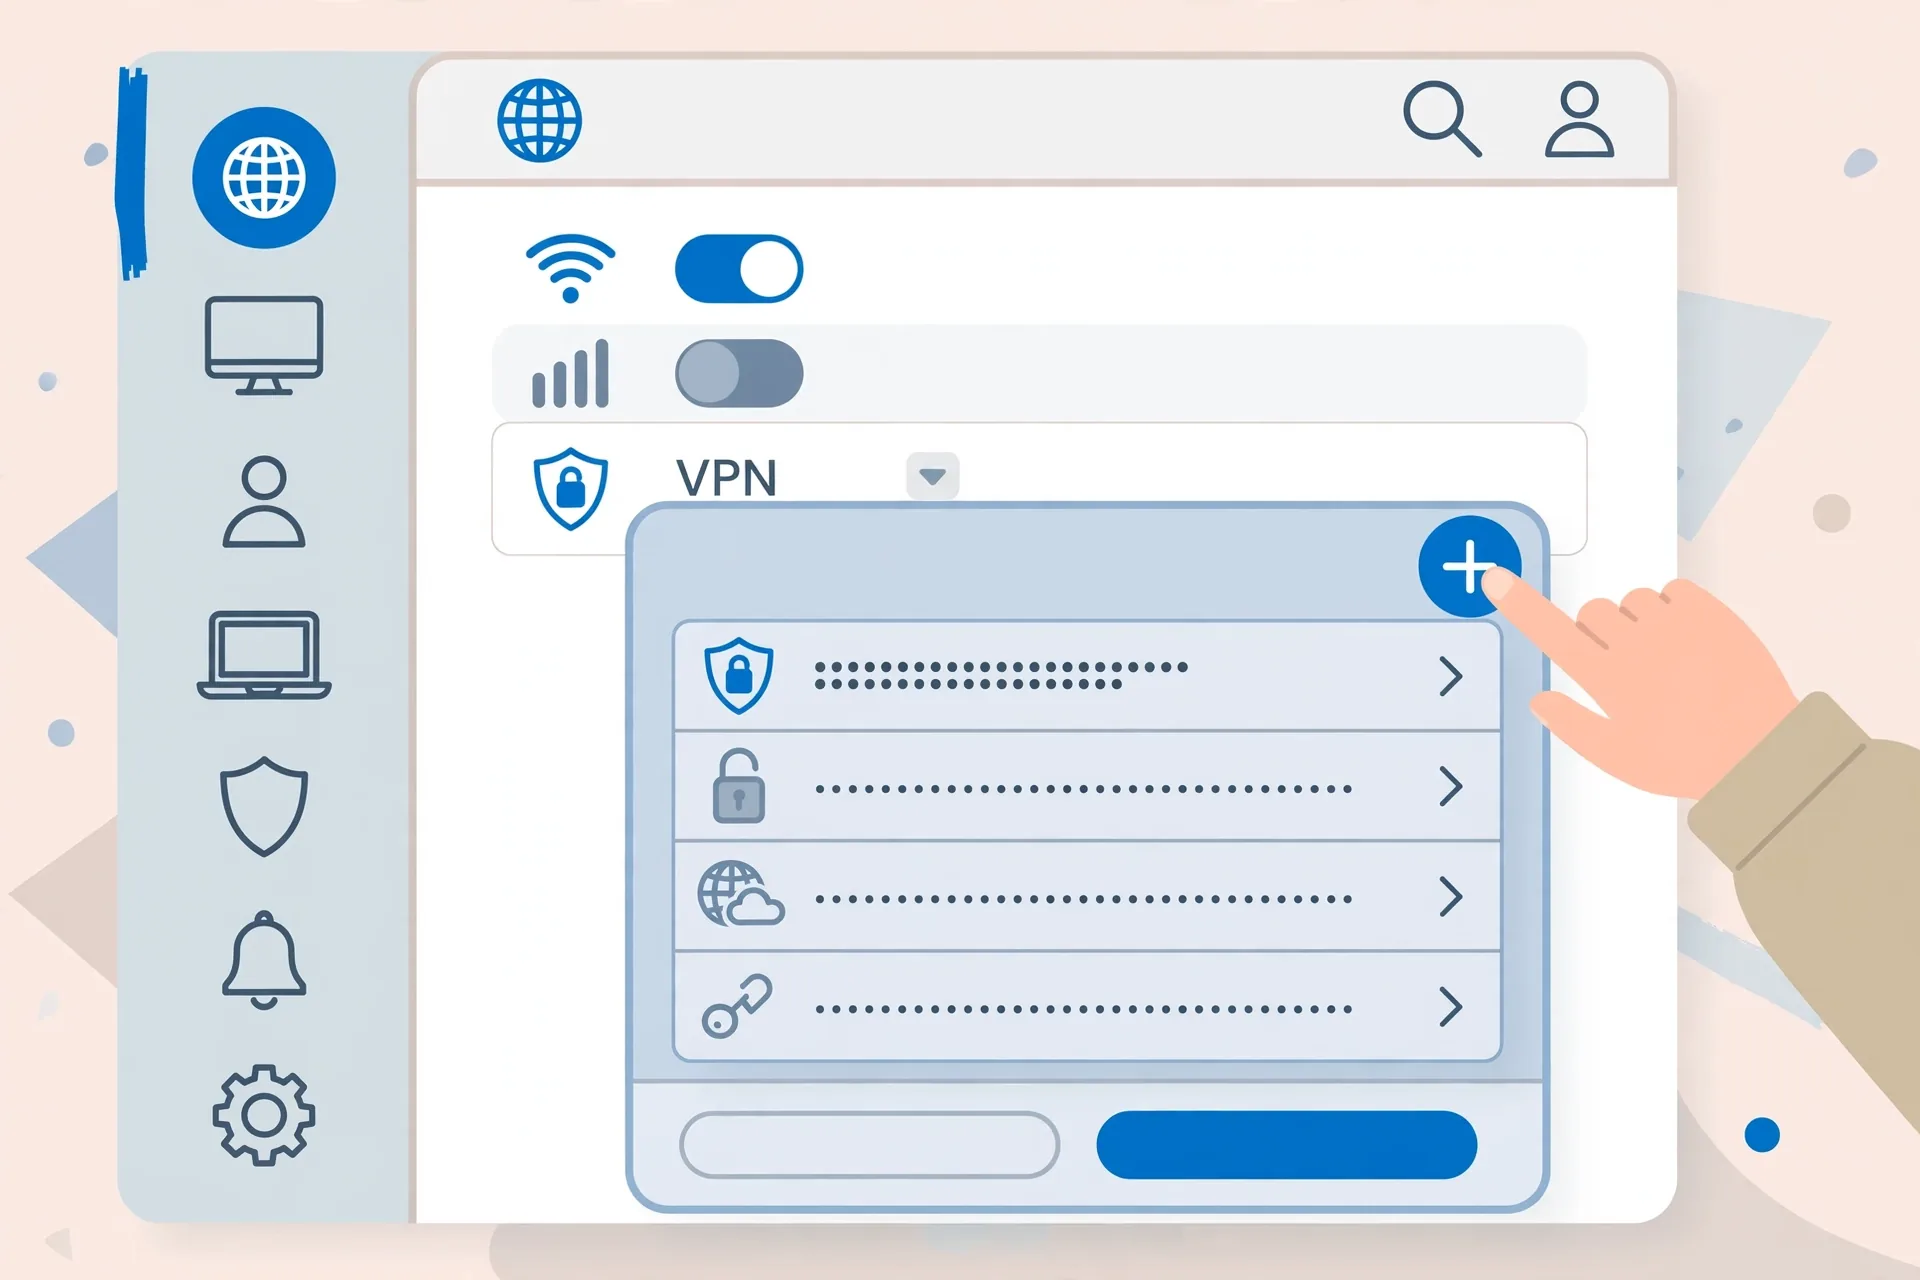
To add a connection, open Settings, go to Network, select Add connection, then Add OpenVPN or L2TP, or Add VPN depending on your ChromeOS version. Choose the provider type, enter the server address, username, password and pre-shared key or certificate details exactly as your provider supplies them.
Save each connection under a clear name, such as the provider and country, so you can tell profiles apart later. A single typing error in a server address or secret produces a vague connection error, so copy details from the provider page rather than typing them from memory.
Manual connections place more responsibility on you for DNS and kill switch behaviour. ChromeOS does not automatically add an app-style kill switch to a manual connection, so a dropped tunnel may return your traffic to the normal route without a warning. Follow your provider documentation on DNS settings exactly.
The built-in client has real strengths despite those demands. It works without a provider app, it survives app updates, and it can use protocols that a browser extension cannot. For a Chromebook without Android app support, it may be the only whole-device route available.
If your provider does not publish ChromeOS manual setup details, ask their support team for the protocol, server address and credentials your Chromebook needs. Do not guess settings from another provider guide, because the wrong protocol choice will simply fail to connect.
Method 4: Linux and Router Options for Advanced Users
Some supported Chromebooks can run Linux apps through the Linux development environment, often called Crostini. That environment lets you install Linux VPN tools, including OpenVPN and WireGuard clients, from the Linux terminal, with fine control over routing and DNS.
This method suits technically confident users who already run Linux apps on their Chromebook. Enable Linux in Settings first, then install the provider Linux app or import OpenVPN or WireGuard configuration files. Managed Chromebooks often disable Linux apps entirely, so check before you plan around it.
A tunnel started inside the Linux container may protect Linux app traffic reliably, while browser and Android app traffic may need separate handling depending on your configuration. Do not assume that a Linux VPN automatically protects your whole Chromebook, and verify each traffic type separately.
Router coverage protects a Chromebook without any VPN software on the Chromebook itself. If your home router supports a VPN client, configure the provider connection on the router, and every device on your network, including the Chromebook, will use the tunnel.
Router setup varies widely by router model and provider, and not every router supports VPN clients. Some routers need third-party firmware, which carries its own risks and is outside this guide. A router VPN also covers only your home network, so it stops protecting the Chromebook at a café or campus.
Tethering through a phone that runs a VPN app can also protect Chromebook traffic, but only while the phone connection is active and only if the phone routes tethered traffic through its tunnel. Test it before you rely on it, because not every phone does this.
NordVPN and ExpressVPN on Chromebook
NordVPN covers both Chromebook paths properly. Its Android app installs from the Play Store and protects the whole device, and its Chrome extension connects on its own with no other software present, so a managed Chromebook with a locked Play Store still keeps a working VPN route.
NordVPN lists its Chromebook setup as three options: install the Android app from Google Play, install the Chrome extension from the Chrome Web Store, or install NordVPN on your router so every connection through the router is protected, including the Chromebook.
The Android app includes NordLynx, which is built on WireGuard, so it stays light on the low-powered processors most Chromebooks use. NordVPN allows ten simultaneous connections on one subscription, and its server network covers 152 countries in the Android app.
ExpressVPN offers an Android app that independent testers in 2026 called the simplest of the major providers to learn, with one connect button and sensible defaults. The app supports Lightway, OpenVPN and WireGuard protocols on Chromebook, and it allows up to eight simultaneous connections.
ExpressVPN also offers a Chrome extension, but it needs the Proxy Mode switch described earlier before it works properly on ChromeOS. Beginners should install the Android app first and treat the extension as a bonus, not as the main setup.
Flagged: NordVPN cautions that some older Chromebook models may not support its Android app, and we could not confirm a complete list of affected models in the sources checked in November 2026. Confirm support for your exact model on the provider page before you subscribe.
For the full cost breakdown of the main alternative in this guide, see our NordVPN pricing guide for Pakistan. Our paid comparison for this device covers the same providers in more depth at our paid VPN comparison for Chromebook.
Proton VPN is another solid option for Chromebook owners who value privacy, with an Android app from Google Play and a Chrome extension. Its free tier with unlimited data lets you test the Android app on your own Chromebook before you pay for the full plan.
Chromebook VPN Permissions: What to Allow and What to Refuse
A VPN app legitimately needs one system permission: the right to create a VPN connection, which ChromeOS confirms with a system prompt the first time you connect. That prompt is the core of the setup, and the app cannot protect anything until you allow it.
The app also needs your subscription login, and it may ask to run in the background so the connection survives when you switch apps. Those requests are normal for a VPN, and you should allow the background permission if you want the connection to stay up while you work.
A VPN app does not need access to your contacts, your files, your photos or your location for basic VPN use. If an app asks for those permissions, pause and check why, because a free app from an unknown developer may be bundling advertising or analytics far beyond the VPN function itself.
Read the permission list on the Play Store page before you install, and be cautious about free apps from unknown developers that show constant advertising. A free VPN that asks for unnecessary permissions deserves suspicion, even if its store rating looks good.
For the built-in ChromeOS client, the permissions are different. You are entering server details and credentials yourself, so there is no app asking for access, but you should still store the credentials carefully and never share a configuration file that contains your username and password.
On a managed Chromebook, permission prompts may be controlled by the administrator, and you may not be able to grant the VPN permission at all. That is a policy limit, not a fault in the app, and the administrator is the only person who can change it.
Finally, check the app permission again after a ChromeOS update. Updates can reset app permissions on rare occasions, and a VPN that silently lost its connection permission will fail to connect with a vague error. Re-open the app and confirm the permission is still granted.
How to Verify the VPN Connection on Chromebook
Verification takes five minutes and saves you from discovering a problem later. Start by disconnecting the VPN and noting your real IP address and location, so you have a baseline to compare against before you trust any green connected indicator.
Connect the VPN in the app or extension, pick your server country, and wait for the status to settle. Then open an IP checker in the Chrome browser and confirm that it shows the VPN server country and an IP address different from your baseline.
If the checker still shows Pakistan, the VPN is not routing your traffic. Disconnect, pick a different server, and try again. If it still shows Pakistan, check that you allowed the VPN permission, and confirm that no second VPN or extension is fighting the first one.
Next, run a DNS leak test. A DNS leak means your DNS requests go to your internet provider instead of through the VPN, which can reveal your browsing even when the IP looks right. Confirm that no Pakistani DNS server appears in the test results.
Also test the specific service you bought the VPN for. If you need a streaming service, a banking portal or a news site, open it while connected and confirm it loads as if you were in the server country. A generic IP check is not enough, because some services block VPN servers even when the IP is correct.
Repeat the test on each method you use. An Android app and a Chrome extension protect different traffic, so verify the app connection and the extension connection separately, and do not assume that one passing test covers the other.
- Disconnect the VPN and note your real IP address and location.
- Connect to a server in the VPN app or extension and wait for it to settle.
- Check your IP on an IP checker and confirm it shows the server country.
- Run a DNS leak test and confirm no Pakistani DNS server appears.
- Open the service you need and confirm it loads correctly.
- Repeat the test after a Chromebook restart to confirm it survives one.

If the tests pass, the VPN is working. If they fail on every server from one provider, use the money-back guarantee and try a different provider rather than fighting a broken setup. Our guide on OpenVPN explained can help if you want to understand the protocol behind the connection.
Keep a note of the server that worked for you, including the country and the app version. If a ChromeOS update later breaks the connection, that note tells you exactly what changed and gives provider support a clear starting point.
How to Remove a VPN Profile From Chromebook
Removing a VPN depends on which method you used, and each route has its own steps. For an Android app, uninstalling the app removes its VPN profile as well, so open the launcher, right-click the app, and select Uninstall, then confirm the removal.
For a Chrome extension, open the Chrome Web Store or the extensions page, find the provider extension, and select Remove from Chrome. The extension and its settings disappear immediately, and no system profile is left behind.
For a built-in ChromeOS connection, open Settings, go to Network, then VPN, and find the connection you added. Select the connection, choose Forget or Remove, and confirm. The saved server address, username and password are deleted with the profile.
If you used the Linux method, remove the configuration files and uninstall the Linux VPN client from the terminal, then disable the Linux environment if you no longer need it. A leftover configuration file with your credentials is a security risk, so do not leave it on the device.
After removal, check that no VPN profile remains. Open Settings, go to Network, then VPN, and confirm the list is empty or shows only the profiles you intended to keep. A forgotten profile can reconnect unexpectedly if auto-connect was switched on.
Also sign out of the provider account inside the app before you uninstall it, if you plan to use the subscription on another device. Signing out first avoids a stale session, though the subscription itself stays active until you cancel it on the provider website.
Troubleshooting: When the VPN Will Not Connect
The most common cause of a failed connection is a missing permission. Open the app, disconnect, and reconnect, then watch for the ChromeOS connection prompt and tap OK. If you denied the prompt the first time, the app cannot create the tunnel until you allow it.
The second most common cause is a wrong server choice. Some servers are busy, blocked or under maintenance, so switch to a different server in the same country, or try a nearby country such as Singapore, before you conclude that the whole provider is at fault.
The third cause is the network itself. Some networks in Pakistan restrict VPN websites, app downloads or particular connection protocols, so a method that works on one connection may fail on another. Try a different Wi-Fi network or mobile hotspot to find out whether the network is the problem.
The fourth cause is an outdated app or ChromeOS version. Open the Play Store, check for app updates, then open Settings, then About ChromeOS, and check for system updates. Provider apps target current releases, and an old version can fail against current servers.
The fifth cause is a conflict between two VPN methods. If you have both an Android app and a Chrome extension installed, or two VPN apps, they can fight over the connection. Disconnect one completely before you test the other, and remove the method you do not use.
The sixth cause is a managed device policy. If your Chromebook is issued by a school or employer, the administrator may block VPN apps, extensions or settings entirely. No troubleshooting step in this guide can override that, and the IT department is the only route forward.
If none of those steps fixes the problem, contact the provider support team with your Chromebook model, ChromeOS version, app version and the exact error message. That detail lets support reproduce the problem instead of guessing, and it usually produces a faster answer.
Limitations to Know Before You Rely on the Setup
A VPN on a Chromebook protects your connection, not your identity from the VPN provider. The provider itself can still see your traffic, so choose one with an independently audited no-logs policy, use a strong unique password, and turn on two-factor authentication if the provider offers it.
A Chrome extension is not a whole-device VPN, and that limit is easy to forget. If you connect only the extension and then open an Android app or a Linux tool, that traffic travels outside the tunnel, and you may believe you are protected when you are not.
No Chrome extension includes a kill switch, so a dropped extension connection can return your browser traffic to the normal route without a warning. The Android app kill switch is the main reason to prefer the app method whenever your Chromebook supports it.
Speed will drop compared with your normal connection, because your traffic travels from Pakistan to the VPN server and back. The size of the drop depends on your internet plan, the time of day and how busy the server is, so test the connection yourself rather than trusting a speed claim in any guide.
Some services detect and block VPN servers, and a provider that works today can be blocked tomorrow. No VPN can promise that a specific streaming service, bank or government portal will always work, so test the service you need inside the money-back guarantee window.
Pakistan rules on VPN use have changed before, and the PTA has restricted unregistered VPN use at times. Keep your provider app updated, follow current PTA guidance, and do not assume that a connection that works today will always be permitted.
Older Chromebooks that no longer receive updates deserve a warning too. They may still browse the web, but they may not support the newest Android apps or the newest VPN features, and an old ChromeOS version can leave security gaps that no VPN can close. Check your update status before you rely on the device.
If you are still weighing free options before you pay, our free VPN comparison for Chromebook covers the no-cost choices and their limits. It is the honest starting point before you commit to a paid plan.
Surfshark — our recommended VPN for Pakistan
If your Chromebook is managed by a school or employer, check with the administrator first — no setup method in this guide can override a locked device policy.
Our Verdict: Which Chromebook VPN Setup Should You Choose?
For most readers in Pakistan, the Android app from Google Play is the right setup: it protects the whole Chromebook, it includes a kill switch, and it takes five minutes. Surfshark is our recommended provider for that route, with unlimited devices and a 30-day money-back guarantee.
Choose the Chrome extension only if your Chromebook cannot run Android apps, or if you need browser protection on a managed device where the Play Store is locked. Treat it as browser-only protection, and do not assume it covers your Android apps or Linux tools.
Choose the built-in ChromeOS client if your provider offers no app, or if you need a manual connection with a specific protocol. It demands more care with DNS and credentials, but it is the only whole-device route on a Chromebook without Play Store support.
Whichever method you choose, verify the connection with an IP checker and a DNS leak test before you trust it, and repeat the test after a restart. A setup that passes those checks is a setup you can rely on, and a setup that fails them is not finished yet.
Frequently Asked Questions
Which VPN Setup Methods Does Chromebook Support?
Chromebook supports four setup methods: an Android VPN app from Google Play, a Chrome browser extension from the Chrome Web Store, the built-in ChromeOS VPN client for IKEv2, L2TP/IPsec, basic OpenVPN and WireGuard on some models, and a Linux or router setup for advanced users. The Android app is the best default because it protects the whole device, while the extension protects only Chrome browser traffic.
Which App or OS Version Requirements Matter?
What matters most is whether your Chromebook supports Google Play and Android apps, which covers most models sold since 2017 and all models launched in or after 2019. ChromeOS updates itself automatically, so the version matters less than Play Store support, but older models and managed school or work devices may not support Android apps at all. Check the Play Store on your device before you pay for any subscription.
How Do I Verify the Connection on Chromebook?
Disconnect the VPN and note your real IP address and location first. Then connect the VPN, open an IP checker in Chrome, and confirm it shows the VPN server country and a different IP address. Run a DNS leak test and confirm no Pakistani DNS server appears, then open the service you need and confirm it loads as if you were in the server country.