The Short Answer: TorGuard Setup for Pakistan Users
Setting up TorGuard in Pakistan takes about ten minutes once you have an account, and Surfshark, with 80% off for our users, is worth a look first if you want a simpler setup with a longer refund window.
For TorGuard itself, the safe path is short: buy the plan on the official TorGuard website, download the app only from torguard.net or the official app stores, sign in, pick a server, and verify the tunnel before you rely on it.
TorGuard is a paid VPN with no free plan and, on the evidence we could verify in November 2026, no free trial. Its standard plan lists 3,000+ servers in 55+ countries, eight simultaneous connections, and a seven-day money-back guarantee. That short refund window matters in Pakistan, because it gives you only a week to test the app on your own connection, ISP, and devices.
This TorGuard setup tutorial was verified against TorGuard’s own support centre and current 2026 reviews on 15 November 2026. We did not run a hands-on TorGuard connection test from Pakistan for this guide, so every setup step below is a documented procedure from TorGuard’s official guides, clearly labelled as such, and not a report of our own measured connection.
Before You Start: TorGuard Setup Pakistan Requirements
A smooth TorGuard setup starts before you download anything. You need a working email address you control, a payment method that works on an international checkout, and a device that meets TorGuard’s minimum requirements. TorGuard’s Windows guide lists Windows 11, Windows 10 version 1607 and later, Windows 8.1, and Windows 7 SP1 with limited support.
On a phone, you need the official TorGuard app from Google Play or the Apple App Store, plus enough free storage for the app and its updates. On a Mac, you need a supported macOS version and permission to install software from the official download. Check your operating system version first, because an out-of-date device is the most common reason an install fails halfway through.
You also need administrator rights on a Windows or Mac computer. TorGuard’s Windows installer asks for administrator permission because it installs a TAP network adapter, which is the virtual network interface the VPN tunnel uses. That prompt is normal and expected. Do not approve a similar prompt from any installer you did not download from TorGuard itself.
What TorGuard Needs From You
TorGuard asks for an email address at signup and uses it for your account, billing receipts, and password recovery. Use an address you can open from Pakistan without a VPN, because you may need to confirm the account or reset the password before the tunnel is working. A secondary email or a recovery option on the same account is worth setting up at the same time.
You should also decide which devices you will protect before you choose a plan. The standard plan allows eight simultaneous connections, and extra connections cost about $1 per month each, according to independent reviews. Count your phone, laptop, tablet, and any family device you plan to add, because hitting the device limit mid-setup is an avoidable frustration.
TorGuard Account Setup: Creating Your Account Step by Step
TorGuard account setup begins on the official TorGuard website, torguard.net, not inside the app. Open the site in your browser, choose the Anonymous VPN plan, and create the account with your email address and a strong password. Use a password you do not reuse anywhere else, and save it in a password manager if you use one.
Choose the billing term carefully at this point. TorGuard sells monthly, quarterly, semi-annual, annual, and longer terms, and the per-month price falls sharply on longer terms. The monthly price is the most expensive way to buy TorGuard, so a short first term makes sense only if you are testing the service and are comfortable with the seven-day refund window.
After payment, TorGuard sends a confirmation email with your account details and a link to the client area. Keep that email. It is the fastest route back into your account if the app asks you to sign in again, and it records the plan, billing term, and renewal date you agreed to. Check the spam folder if the message does not arrive within a few minutes.
Confirming Your Account and Plan
Sign in to the TorGuard client area on the website and confirm that the plan shown matches what you bought. Check the number of simultaneous connections, the billing term, and the renewal date. If anything looks wrong, contact TorGuard support before you install the app, because a billing correction is easier before the seven-day guarantee starts running down.
The client area is also where TorGuard’s configuration generator lives. You will need it later only if you set up a manual OpenVPN or WireGuard profile, which most readers should skip. For the standard setup in this guide, the client area is simply your account record and download hub, and you can leave the advanced tools alone for now.
TorGuard Official Download: Where to Get the App Safely
The TorGuard official download comes from two safe places only: the TorGuard website for desktop apps, and Google Play or the Apple App Store for mobile apps. Never download TorGuard from a third-party download site, a file-sharing link, or a search result that promises a free or cracked version. Those copies are the most common way a VPN install turns into malware.
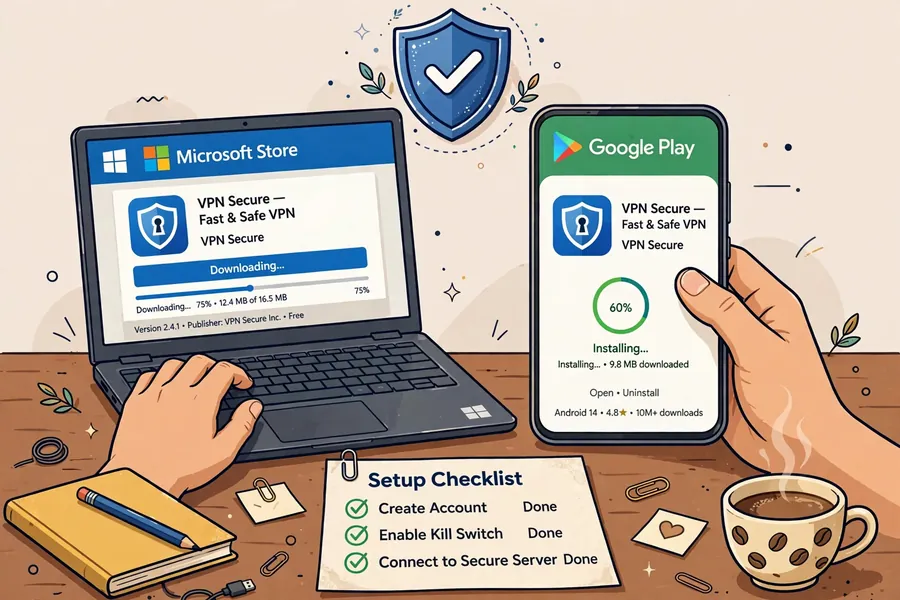
On a Windows or Mac computer, sign in to the TorGuard client area and use the download link for your operating system. TorGuard’s Windows guide offers a recommended .EXE installer and a portable .ZIP version that needs no installation. Most readers should choose the .EXE installer, because it sets up the TAP adapter and the app in one pass.
On Android, install the TorGuard app from Google Play, and on iPhone or iPad, install it from the App Store. Check the developer name before you tap install: the Android app is published by VPNetworks, LLC. A lookalike app with a similar name and icon is not the official app, even if it appears in the same search results.
How to Spot a Fake TorGuard Download
A genuine TorGuard download page is on torguard.net, and a genuine mobile listing links back to TorGuard’s own support email, helpdesk@torguard.net. Be suspicious of any site that asks you to disable your antivirus, run an unusual installer, or pay through an unfamiliar payment page. TorGuard’s own checkout and app-store listings never ask for those steps.
If a download stalls or your browser warns about the file, stop and re-download from the client area rather than accepting a warning you do not understand. A slow connection in Pakistan can make a large installer look stuck when it is simply still downloading. Wait, check the file size against the download page, and only then run the installer.
TorGuard Install App on Windows: Step-by-Step TorGuard Setup Tutorial
TorGuard’s own Windows guide, published on 15 November 2026, describes a setup that takes under a minute once the installer is downloaded. Double-click the file named torguard-setup-latest.exe in your Downloads folder. Windows will show a security prompt asking for administrator rights so the installer can add the TAP network adapter, and you should approve it.
Follow the installer’s prompts and accept the default settings unless you have a specific reason to change them. The installer places the TorGuard app on your computer and creates a desktop shortcut. When it finishes, open the app from the shortcut or the Start menu and sign in with the email address and password you used at signup.
After sign-in, the app shows its main dashboard with a connect button and the server list. Do not connect yet if you want to choose a protocol first. The default settings will work for most readers, and the protocol choice is covered in detail later in this guide. For a first connection, the defaults are the safest starting point.
Windows System Requirements and the TAP Adapter
TorGuard lists Windows 11, Windows 10 version 1607 and later, Windows 8.1, and Windows 7 SP1 with limited support. If you are still on Windows 7, expect missing features and plan an upgrade, because TorGuard’s own guide marks that version as limited support and future updates may drop it entirely.
The TAP adapter is a virtual network card that carries the encrypted tunnel. If Windows asks you to approve a driver install during setup, that is the TAP adapter, and approving it is part of a normal install. If the adapter fails to install, the app may open but never connect, so reinstalling with administrator rights is the first fix to try.
TorGuard Install App on macOS
On a Mac, download the TorGuard app from the official TorGuard website and open the downloaded .DMG file. Drag the TorGuard icon into your Applications folder, then open the app from Applications or Launchpad. macOS may ask you to confirm that you want to open an app downloaded from the internet, which is a standard macOS security check.
The first time you connect, macOS will ask for permission to install a VPN configuration. Approve it, because without that permission the app cannot create the tunnel. You may need to enter your Mac password or use Touch ID, depending on how your Mac is set up. This step happens once, not on every connection.
Sign in with your TorGuard account details after the install. The macOS app uses the same server list and protocols as the Windows app, so the connection steps later in this guide apply in the same way. Keep the app updated through TorGuard’s own download page, because macOS updates sometimes change the VPN permission rules.
TorGuard Setup on Android
TorGuard setup on Android starts in Google Play. Search for TorGuard, check that the developer is VPNetworks, LLC, and install the app. The Play Store listing states clearly that the app is not free and requires a premium TorGuard VPN account from torguard.net, so install it only after you have bought a plan.
Open the app and sign in with your TorGuard account. Android will ask you to approve a VPN connection request the first time you connect, showing a warning that the app can monitor your network traffic.
That warning is Android’s standard message for every VPN app, and approving it is required for the tunnel to work. The app cannot read your traffic itself; the warning describes the permission, not TorGuard’s behaviour.
Choose a server from the list, tap connect, and wait for the status to change to connected. Android shows a small key icon in the status bar while a VPN is active. If the key icon disappears, the tunnel has dropped, and you should reconnect before opening any app that needs the VPN.
Android Permissions Worth Checking
TorGuard on Android needs the VPN permission and, for the best experience, permission to run in the background. Some Android phones aggressively close background apps to save battery, which can drop the VPN without warning. If your connection drops when the screen locks, check your phone’s battery optimisation settings and exempt TorGuard from optimisation.
Also check that you have not set a data saver or a second VPN app that conflicts with TorGuard. Android allows only one active VPN at a time, so a second VPN app, a work profile VPN, or a private DNS setting that conflicts can stop TorGuard from connecting. Turn the other VPN off before you test TorGuard.
TorGuard Setup on iPhone and iPad
On iPhone and iPad, install the TorGuard app from the App Store and sign in with your account. iOS installs a VPN profile the first time you connect, and the phone will ask you to allow it. Approve the profile, using Face ID, Touch ID, or your passcode when asked. Without that profile, the app cannot build a tunnel.
Once the profile is installed, pick a server and tap connect. iOS shows a VPN indicator in the status bar while the tunnel is active. You can also check the connection in Settings, under General and then VPN, where the TorGuard profile should show as connected with a green status.
Keep the TorGuard app updated from the App Store, because iOS updates sometimes change how VPN profiles are handled. An app that worked before an iOS update can fail after it until TorGuard ships a matching update, so check for an app update first whenever a connection that used to work suddenly stops.
TorGuard Setup on Linux
TorGuard offers a Linux app and manual configuration options, which suits the readers who run Linux as a daily desktop. Download the Linux app from the TorGuard website and follow the install steps for your distribution. The exact commands differ between distributions, so follow TorGuard’s Linux guide for your version rather than a generic Linux VPN tutorial.
Linux users who prefer manual setup can use TorGuard’s configuration generator to create OpenVPN or WireGuard profiles. That route is officially supported and is covered later in this guide. It needs more care than the app route, because you must import the right profile and enter your credentials correctly, but it gives you full control over the connection.
If you run Linux on a low-powered device or a server, WireGuard is usually the better protocol choice, because it uses less CPU than OpenVPN. TorGuard’s own speed guidance makes the same point for routers and small devices, and the same logic applies to an old laptop or a single-board computer.
TorGuard Connect to Server: Choosing a Location and Protocol
Connecting to a server is the simplest step in this TorGuard setup tutorial, and also the one where a wrong choice causes the most confusion. Open the TorGuard app, open the server list, and choose a country. The app shows server locations grouped by country, and you can search for a country by name if the list is long.
For the fastest connection from Pakistan, choose a server close to you, such as Singapore, India, or the United Arab Emirates, rather than a faraway location. Distance adds latency on every VPN, and no provider can change the physics of the route from Lahore, Karachi, or Islamabad to a distant server. A nearby server is the right first test, even if your final use needs a different country.
Tap the server or the connect button and wait for the status to change. The app should show a connected state, the server you chose, and your new exit IP address. If the app connects but a website still shows your Pakistan location, the tunnel may not be carrying your traffic, and the verification steps later in this guide will catch that.
Choosing a Protocol: WireGuard, OpenVPN, and OpenConnect
TorGuard supports WireGuard, OpenVPN, OpenConnect, and, on some platforms, IKEv2. For most readers in Pakistan, WireGuard is the best starting point: it is modern, fast, and simple, and TorGuard’s own guides recommend it for the best speed. OpenVPN is the reliable fallback when WireGuard is blocked or unstable on your network.
OpenVPN comes in two forms, UDP and TCP. TorGuard’s own documentation recommends OpenVPN UDP for the best balance of speed and reliability, and OpenVPN TCP on port 443 when you need to bypass a restrictive firewall, because port 443 is the port used by ordinary secure websites and is rarely blocked.
OpenConnect is a further option for networks that block the other protocols, and TorGuard documents it for exactly that situation.
Change the protocol in the app settings, then disconnect and reconnect for the change to take effect. Do not change several settings at once when you are troubleshooting, because you will not know which change fixed the problem. Change one setting, reconnect, and test before you change anything else.
| Protocol | Best For | Port TorGuard Documents | Notes for Pakistan Users |
|---|---|---|---|
| WireGuard | Everyday use and speed | 51820 | Best first choice; lowest overhead on most devices |
| OpenVPN UDP | Reliable general use | 1194 | Good balance of speed and reliability |
| OpenVPN TCP | Restrictive networks | 443 | Uses the HTTPS port; rarely blocked |
| OpenConnect | Heavily restricted networks | Varies | Fallback when WireGuard and OpenVPN fail |
| IKEv2 | Mobile reconnections | Varies | Useful on phones that switch networks often |
TorGuard Configuration Guide: Settings Worth Changing First
TorGuard’s app ships with sensible defaults, and most readers should leave most settings alone. Three settings are worth understanding before you change them: the kill switch, the protocol, and the DNS setting. The kill switch blocks your internet if the VPN drops, so your real IP address is never exposed by accident. Turn it on if you use TorGuard for privacy-sensitive work.
The protocol setting controls how the tunnel is built, as described above. Leave it on WireGuard unless you have a reason to change it, and only change it when you are disconnected. The DNS setting controls which server resolves website names for you. TorGuard’s own DNS is the safe default, because using your ISP’s DNS while the VPN is on can leak the sites you visit to your ISP.
One more setting matters on Windows: the MTU, or maximum transmission unit, which controls packet size for OpenVPN connections. TorGuard’s optimisation guide suggests setting MTU to High, or 1500, for cable and fibre connections, and Low, or 1300, for mobile or problem networks. Only change MTU if you use OpenVPN and your connection is slow or unstable, because the wrong MTU can make a working connection worse.
Settings to Leave Alone Until You Need Them
TorGuard exposes advanced options such as port forwarding, dedicated IPs, stealth VPN, and custom routes. Port forwarding is a paid add-on that opens a port through the tunnel for specific uses, and it is not needed for ordinary browsing. A dedicated IP is a separate paid add-on that gives you an IP address used only by you, and it is not part of the standard plan.
Stealth VPN is TorGuard’s obfuscation feature, designed to hide VPN traffic from networks that detect and block it. It can help on a restrictive network, but it adds overhead and complexity, so try the standard protocols first. If a standard connection works, you do not need stealth mode, and turning it on will only slow you down.
TorGuard Manual Profiles: OpenVPN and WireGuard Config Generator
Manual profiles are the one part of TorGuard setup where the official path is genuinely more powerful than the app, and also the part where mistakes are easiest. TorGuard officially supports manual OpenVPN and WireGuard profiles through its configuration generator in the client area. Use it only when you need it: for a router, a Linux system without the app, or a device the app does not support.
To generate a profile, sign in to the TorGuard client area, open the configuration generator, and choose the tunnel type, either OpenVPN or WireGuard. Pick a server location, and the generator produces a configuration file you can download. For OpenVPN, that file ends in .ovpn; for WireGuard, it is a WireGuard configuration file with keys already included.
Import the file into your OpenVPN client, your WireGuard app, or your router’s VPN section, then enter your TorGuard VPN username and password when asked. Note that TorGuard’s VPN username and password for manual profiles may differ from the email and password you use to sign in to the website, so check the client area for the correct credentials before you import the profile.
When Manual Setup Is the Right Choice
Manual setup is the right choice for a router, because a router has no TorGuard app to install. It is also the right choice for a Linux system where you prefer the standard WireGuard or OpenVPN tools. It is the wrong choice for a Windows, Mac, Android, or iPhone user who simply wants a working VPN, because the app handles the same steps with fewer chances to go wrong.
If you do use a manual profile, keep it updated. TorGuard changes server addresses over time, and an old .ovpn file can point at a server that no longer exists. Regenerate the profile from the client area if a manual connection that used to work stops connecting, before you assume the service itself is down.
TorGuard Setup on a Router: Whole-Home Coverage
Setting up TorGuard on a router protects every device on your home network, including smart TVs, game consoles, and devices that cannot run a VPN app. TorGuard publishes official router guides for GL.iNet travel routers, DD-WRT, OpenWRT, pfSense, and OPNsense, and those guides are the only router instructions you should follow for this provider.
For a GL.iNet router on modern firmware, TorGuard recommends WireGuard: generate a WireGuard configuration in the TorGuard client area, import it in the router’s VPN section, and activate the WireGuard client. For older GL.iNet firmware, TorGuard documents an OpenVPN route instead, using a downloaded .ovpn configuration package with your TorGuard credentials. Check your router’s firmware version first, because the steps differ between old and new firmware.
For DD-WRT, TorGuard’s guide requires a build with WireGuard support, generally build r44048 or newer, with at least 128 MB of RAM and an ARM or newer MIPS processor. Not every DD-WRT build includes WireGuard, so check your build’s feature list before you start. The setup itself follows the same pattern: generate the configuration, import it, and enter your credentials.
Router Limits You Should Know Before You Start
A router’s processor is far weaker than a laptop’s, so VPN speed on a router will be lower than on a computer. TorGuard’s own router guide gives rough figures for GL.iNet models, with WireGuard several times faster than OpenVPN on the same hardware. That gap is why TorGuard recommends WireGuard on routers wherever the router supports it.
Also remember that a router VPN counts toward your simultaneous connection limit, and every device behind the router shares that one connection. That is efficient for the device count, but it also means a router problem takes every device offline at once. Keep a device with the TorGuard app as a backup, so one router failure does not leave you with no VPN at all.
Why Many Pakistan Readers Choose Surfshark Instead
TorGuard is a capable specialist VPN, but it is not the easiest first VPN for a reader in Pakistan. Its monthly price is high, its refund window is only seven days, it has no free trial or free plan, and its no-logs policy has not been independently audited, according to multiple 2026 reviews.
Its interface also exposes more settings than a first-time user needs, which is a strength for a power user and a hurdle for everyone else.
Surfshark is our recommended VPN for Pakistan because it solves the problems TorGuard leaves open. It costs far less on a long-term plan, with 80% off for our users, it covers unlimited devices on one subscription, and it carries a 30-day money-back guarantee, which gives you a full month to test it from Pakistan instead of a single week.
Surfshark also offers a seven-day free trial on mobile through Google Play and the App Store, so you can try the app before you pay anything. Its apps are simpler to set up, its server list is easier to browse, and its support for streaming and everyday use is stronger without paid add-ons. If you are setting up your first VPN in Pakistan, that combination is hard to beat.
Surfshark — our recommended VPN for Pakistan
Unlimited devices, a 30-day money-back guarantee, and our readers save 80% — a simpler TorGuard alternative for Pakistan users.
When TorGuard Is Still the Right Choice
TorGuard is still the right choice for a specific reader: someone who needs port forwarding, a dedicated IP, or fine control over protocols and routing, and who is comfortable managing those settings. Its support for OpenVPN, WireGuard, OpenConnect, and manual profiles is broader than most consumer VPNs, and its router guides are unusually detailed.
If that reader is you, the setup in this guide will serve you well. If you simply want a VPN that installs in minutes, connects with one tap, and covers every device in the house, Surfshark is the simpler answer, and the seven-day TorGuard refund window is too short to discover that after you have paid.
TorGuard Verify Connection: How to Check the Tunnel Is Working
Verification is the step most setup guides skip, and it is the step that catches the mistakes that matter. A VPN app can say connected while your traffic still leaks outside the tunnel, so check the tunnel yourself before you trust it.
The checks below are a test procedure we recommend; we have not run them ourselves from a Pakistan connection for this guide, so treat them as an untested method, not as our own measured results.
First, record your real IP address before you connect. With TorGuard off, open an IP-checking site in your browser and note the IP address and the location it reports, which should show Pakistan and your ISP. Write both down, because you will compare them against the connected result in the next step.
Second, connect to your chosen TorGuard server, wait for the connected status, and open the same IP-checking site again. The IP address should be different, and the location should match the server you chose, not Pakistan. If the address is unchanged, the tunnel is not carrying your traffic, and you should disconnect, check the app settings, and reconnect.

Checking for DNS and WebRTC Leaks
An IP check alone is not enough, because your browser can leak your real location in two other ways. A DNS leak happens when website names are resolved by your ISP’s DNS server instead of TorGuard’s, which can reveal the sites you visit. A WebRTC leak happens when your browser reveals your real IP address directly to a website, even while the VPN is on.
Test for both with a leak-testing site while connected. The DNS servers shown should belong to TorGuard or to the VPN’s network, not to PTCL, Jazz, Zong, Telenor, or your home ISP. The WebRTC result should show only the VPN’s IP address, not your real Pakistan IP. If either test shows your real address or your ISP, turn on the kill switch, switch protocol, and test again.
What to Do If the Check Fails
If the IP address does not change, the most common causes are a second VPN running at the same time, a stale app that needs an update, or a protocol blocked by your network. Turn off any other VPN, update the TorGuard app, and try OpenVPN TCP on port 443, which is the hardest protocol for a network to block.
If the IP changes but the location is wrong, the problem may be a geolocation database that has not updated the server’s IP address yet. Check the same IP on a second IP-checking site, because databases disagree with each other. If both sites agree the location is wrong, switch to another server in the same country and test again.
TorGuard Pricing for Pakistan Users: What It Costs in PKR
TorGuard pricing is the part of this guide where sources disagree, so read this section as a flagged conflict, not as a settled price. TorGuard’s own purchase page lists the Anonymous VPN Standard plan at $9.99 per month, or $59.99 per year, and the Pro plan at $12.99 per month, or $69.99 per year, according to 2026 reviews of that page.
Other 2026 sources quote different figures for the same plans. Some list Standard at $10.99 per month and Pro at $14.29 per month, while a live deal check in 2026 found Standard at $29.99 for the first twelve months, or $2.50 per month, against a regular annual price of $59.99. Those figures cannot all be the price you will pay, because TorGuard runs promotions that change the checkout total.
The safest reading is this: the monthly price is about $10, the regular annual price is about $60 for Standard, and promotional pricing can cut the first year roughly in half. Always read the cart total, the renewal price, and the billing term at checkout, and do not trust any article, including this one, as a substitute for the checkout page.
| Plan | Monthly Price Reported | Annual Price Reported | Simultaneous Connections | Notes |
|---|---|---|---|---|
| Anonymous VPN Standard | $9.99, or $10.99 in some 2026 sources | $59.99, or $29.99 first-year promotion | 8 | Core shared-IP plan; port forwarding included |
| Anonymous VPN Pro | $12.99, or $14.29 in some 2026 sources | $69.99 | 12 | Adds a dedicated streaming IP and priority support |
| Business VPN | $32.99 per month | Varies by team size | Varies | For remote teams; priority support |
| Anonymous Email | $3.58 per month | Varies | Not a VPN plan | Encrypted email only; not a VPN substitute |
Using the State Bank of Pakistan reference rate of about PKR 276.60 per US dollar on 13 November 2026, the Standard monthly price of $9.99 converts to roughly PKR 2,763 per month, and the regular annual price of $59.99 converts to roughly PKR 16,593 per year.
The promotional first-year price of $29.99 converts to roughly PKR 8,295, but that figure applies only if the promotion is live when you check out.
The Seven-Day Refund Window and Add-On Costs
TorGuard offers a seven-day money-back guarantee on the Standard plan, which is far shorter than the 30-day window most leading VPNs offer. Some 2026 sources also report that refunds are not available for payments made with cryptocurrency or gift cards, and that dedicated IPs are excluded from the guarantee. If you pay anonymously, assume you cannot get a refund, and test carefully before you commit.
Add-ons can also change the total. A dedicated IP costs about $7.99 per month extra, according to 2026 reports, and a dedicated streaming IP is included in the Pro plan but costs extra on Standard. Extra simultaneous connections cost about $1 per month each. Add those figures to the plan price before you compare TorGuard with a provider that includes the same features in its base plan.
Paying for TorGuard From Pakistan
TorGuard accepts international Visa and Mastercard, PayPal, and, for readers who want anonymity, Bitcoin and gift cards. A Pakistani debit card may be declined on TorGuard’s checkout if your bank blocks international e-commerce, which happens with some banks. If your card is declined, try PayPal where it is offered, or check whether your bank allows you to enable international transactions.
Paying through the app stores is another option if you subscribe on a phone, because the App Store and Google Play use your existing app-store payment method. Prices in the app store may differ from the website price, so compare both before you pay. App-store subscriptions are also managed through the store, so cancellation and refund steps differ from a website purchase.
Do not pay with cryptocurrency or a gift card unless you accept that the payment is final. TorGuard’s refund limits on anonymous payments are a real cost, and the seven-day guarantee may not protect you. For a first TorGuard subscription, a card or PayPal payment is the safer choice, because it keeps the refund option open.
PTA Context and Using TorGuard in Pakistan
VPNs are legal to use in Pakistan for legitimate purposes, but the PTA has restricted unregistered VPN use at times, and local guidance has changed before. TorGuard’s website and apps are reachable from Pakistani networks as far as we could verify in November 2026, and TorGuard sells to customers in Pakistan without a country restriction on its purchase page.
Keep your TorGuard app updated, because providers change server addresses and fix connection problems in updates, and an old app can silently fail on a Pakistani network. If a connection that worked yesterday stops working today, check for an app update and try a different protocol before you assume the service is blocked. Follow current PTA guidance alongside this guide, because local rules can change faster than any article.
TorGuard Setup on Other Devices and Platforms
TorGuard’s supported devices cover the platforms most Pakistan readers use: Windows, macOS, Linux, Android, and iOS. The provider also documents setup for routers, and its Android app runs on Android TV devices where the Play Store offers it. That coverage is broad, but it is not the same as a dedicated app for every screen in the house.
There is no dedicated TorGuard app for most smart TVs, game consoles, or streaming sticks, so those devices need the router route described above. A Fire TV stick, for example, has limited CPU power for VPN encryption, and TorGuard’s own speed guidance warns that low-powered devices should use WireGuard only. Expect a lower speed on such a device than on a laptop.
Browser extensions are another gap worth knowing about. TorGuard’s strength is its full VPN app and manual profiles, not a lightweight browser extension. If you only need to protect browser traffic, a provider with a browser extension may suit you better, but if you need whole-device protection, TorGuard’s app is the right tool.
Supported Devices at a Glance
| Device or Platform | Official TorGuard App | Manual Profile Support | Notes |
|---|---|---|---|
| Windows 10 and 11 | Yes | Yes, OpenVPN and WireGuard | Needs administrator rights for the TAP adapter |
| macOS | Yes | Yes, OpenVPN and WireGuard | Needs VPN profile permission on first connect |
| Linux | Yes | Yes, OpenVPN and WireGuard | Steps differ by distribution |
| Android | Yes, Google Play | Yes, via OpenVPN or WireGuard apps | Check the developer is VPNetworks, LLC |
| iPhone and iPad | Yes, App Store | Yes, via profile import | Needs VPN profile permission on first connect |
| Routers (GL.iNet, DD-WRT, OpenWRT) | No | Yes, officially documented | WireGuard recommended where supported |
| Smart TV and consoles | No dedicated app | Via router only | Use WireGuard on low-powered devices |
Limitations and Exceptions
TorGuard setup is straightforward, but the service has limits that should shape your decision. First, there is no free plan and no free trial, so every test costs money, and the seven-day refund window is the only safety net. Second, streaming is a known weakness on the Standard plan: multiple 2026 reviews report that major streaming services often need the paid dedicated streaming IP, which costs extra.
Third, TorGuard is based in the United States, a member of the Five Eyes intelligence alliance, and its no-logs policy has not been independently audited, according to 2026 reviews from Top10VPN and Tom’s Guide. TorGuard states that it does not collect or log VPN or proxy usage data, but without a published audit, that claim rests on the provider’s word alone.
Readers who need an audited no-logs policy should weigh that carefully.
Fourth, TorGuard settled with film studios in March 2022 and agreed to block BitTorrent traffic on its US servers. That settlement does not affect ordinary browsing, but it does affect readers who chose TorGuard for file-sharing. Check TorGuard’s current policy for your use case before you subscribe, because the restriction is specific to US servers and to BitTorrent traffic.
Exceptions Worth Remembering
A TorGuard setup that works on one Pakistani ISP may fail on another, because ISPs route traffic differently and apply different restrictions. A protocol that connects on PTCL fibre may stall on a Jazz mobile connection, so test on the network you will actually use, not only on your home Wi-Fi.
The same applies to devices: an app version that works on a new phone may fail on an older phone that no longer receives updates.
Finally, TorGuard’s pricing presentation changes often, with promotions, bundles, and plan names that shift between checks. The figures in this guide are verified as of 15 November 2026 and flagged where sources conflict. If the checkout page shows a different price, plan name, or device count when you buy, trust the checkout page, and keep a screenshot of the price you agreed to.
Frequently Asked Questions
Where Should I Download the Official TorGuard App?
Download the TorGuard app only from the official TorGuard website, torguard.net, for Windows, macOS, and Linux, or from Google Play and the Apple App Store for Android, iPhone, and iPad. On Android, check that the developer is VPNetworks, LLC before you install. Never download TorGuard from a third-party download site or a link promising a free version, because those copies can carry malware and are not the official app.
How Do I Connect to a Server?
Open the TorGuard app and sign in with your account, then open the server list and choose a country, or search for one by name. For the fastest connection from Pakistan, start with a nearby server such as Singapore, India, or the United Arab Emirates.
Tap the server or the connect button, wait for the status to change to connected, and check that the app shows the server you chose and your new exit IP address.
How Can I Check That the Tunnel Is Working?
Record your real IP address with TorGuard off, then connect and check the same IP-checking site again: the address and location should both change to match your chosen server. Then run a DNS leak test and a WebRTC leak test while connected, and confirm that neither shows your real Pakistan IP address or your ISP’s DNS servers.
If any test shows your real address, disconnect, turn on the kill switch, try another protocol, and test again.
Surfshark — our recommended VPN for Pakistan
Set up in minutes, test for 30 days, and save 80% — the simpler choice for most Pakistan users.
Our Verdict: Is TorGuard Setup Worth It for Pakistan Users?
TorGuard setup in Pakistan is a documented, official process that works when you follow it step by step: buy on torguard.net, download only from official sources, install with administrator rights where needed, choose WireGuard first, and verify the tunnel with an IP, DNS, and WebRTC check. The app is powerful, the manual profiles are genuinely useful, and the router guides are among the most detailed in the industry.
The case against TorGuard for most Pakistan readers is not the setup, which is manageable, but the price, the seven-day refund window, the lack of a free trial, and the streaming add-on cost. Those trade-offs matter more than any single setup step, and they are the reason many readers will be happier with a simpler provider.
Test TorGuard only if you need its specific strengths, and test it inside the refund window on your own connection.
For the latest guides from our team, visit the freevpn.pk homepage.